


 There are some rooms that just ooze charm even when the room is completely empty—tall ceilings, large windows, details in woodwork or molding are all things that can give a room a head start on charm.
Sometimes, however, you have a room that has none of those details and it can feel really difficult to add that personality into the space, and all the bedrooms in our ’60s ranch home have that particular challenge.
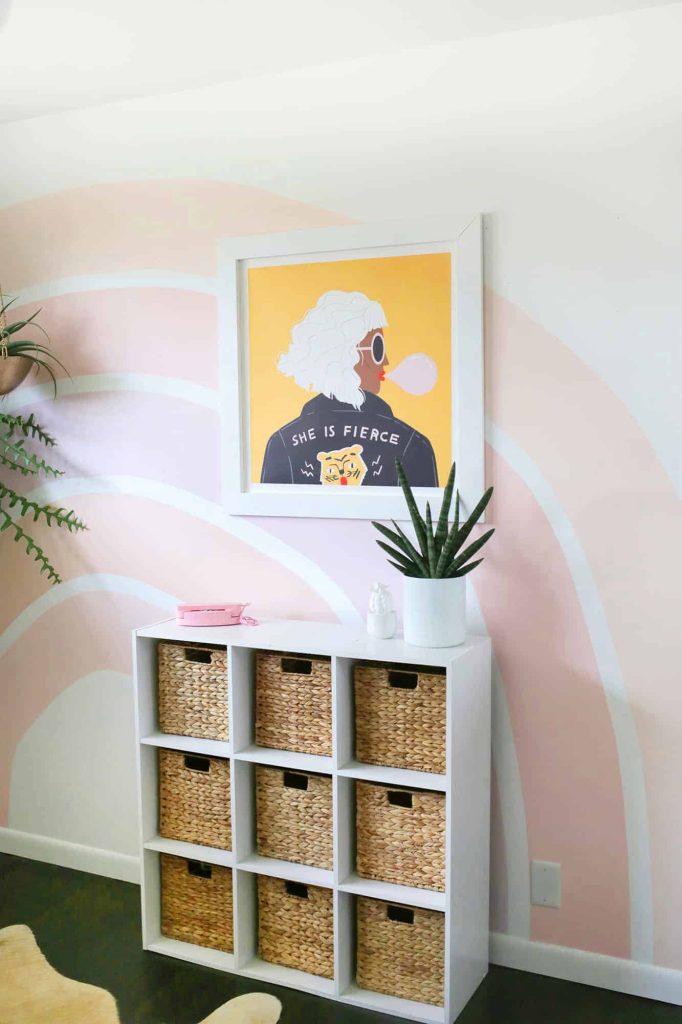
When converting my office/craft room into a playroom for our daughter, the first thought I had when I pulled out all the office stuff was “Wow. This looks so boring.” And I knew I had to add a fun detail to the walls to make it come alive a bit.
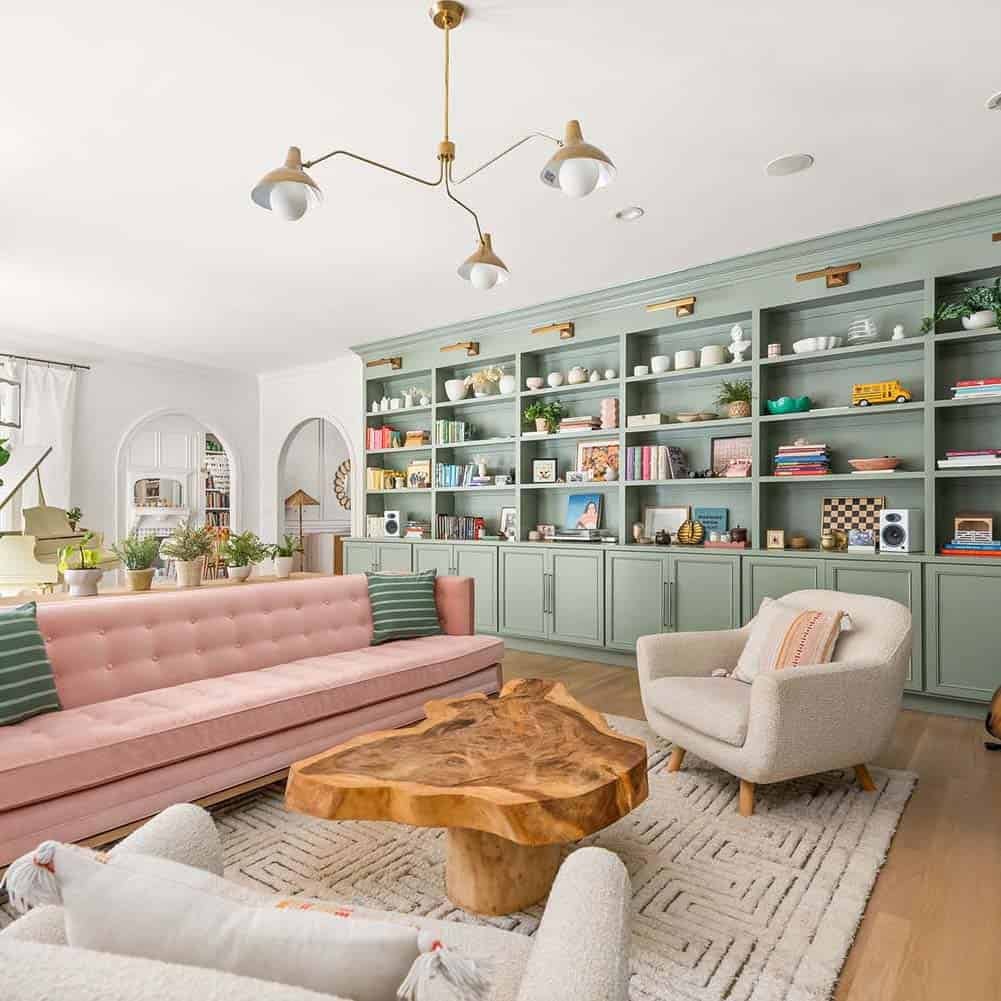
I was browsing through the A Color Story Instagram feed a few months ago and came across this photo and I loved the neutral rainbow that spanned the corner of the wall (thanks internet for solving the mystery and letting me know Grace Dille designed it at the Flea Style—it’s so good!).
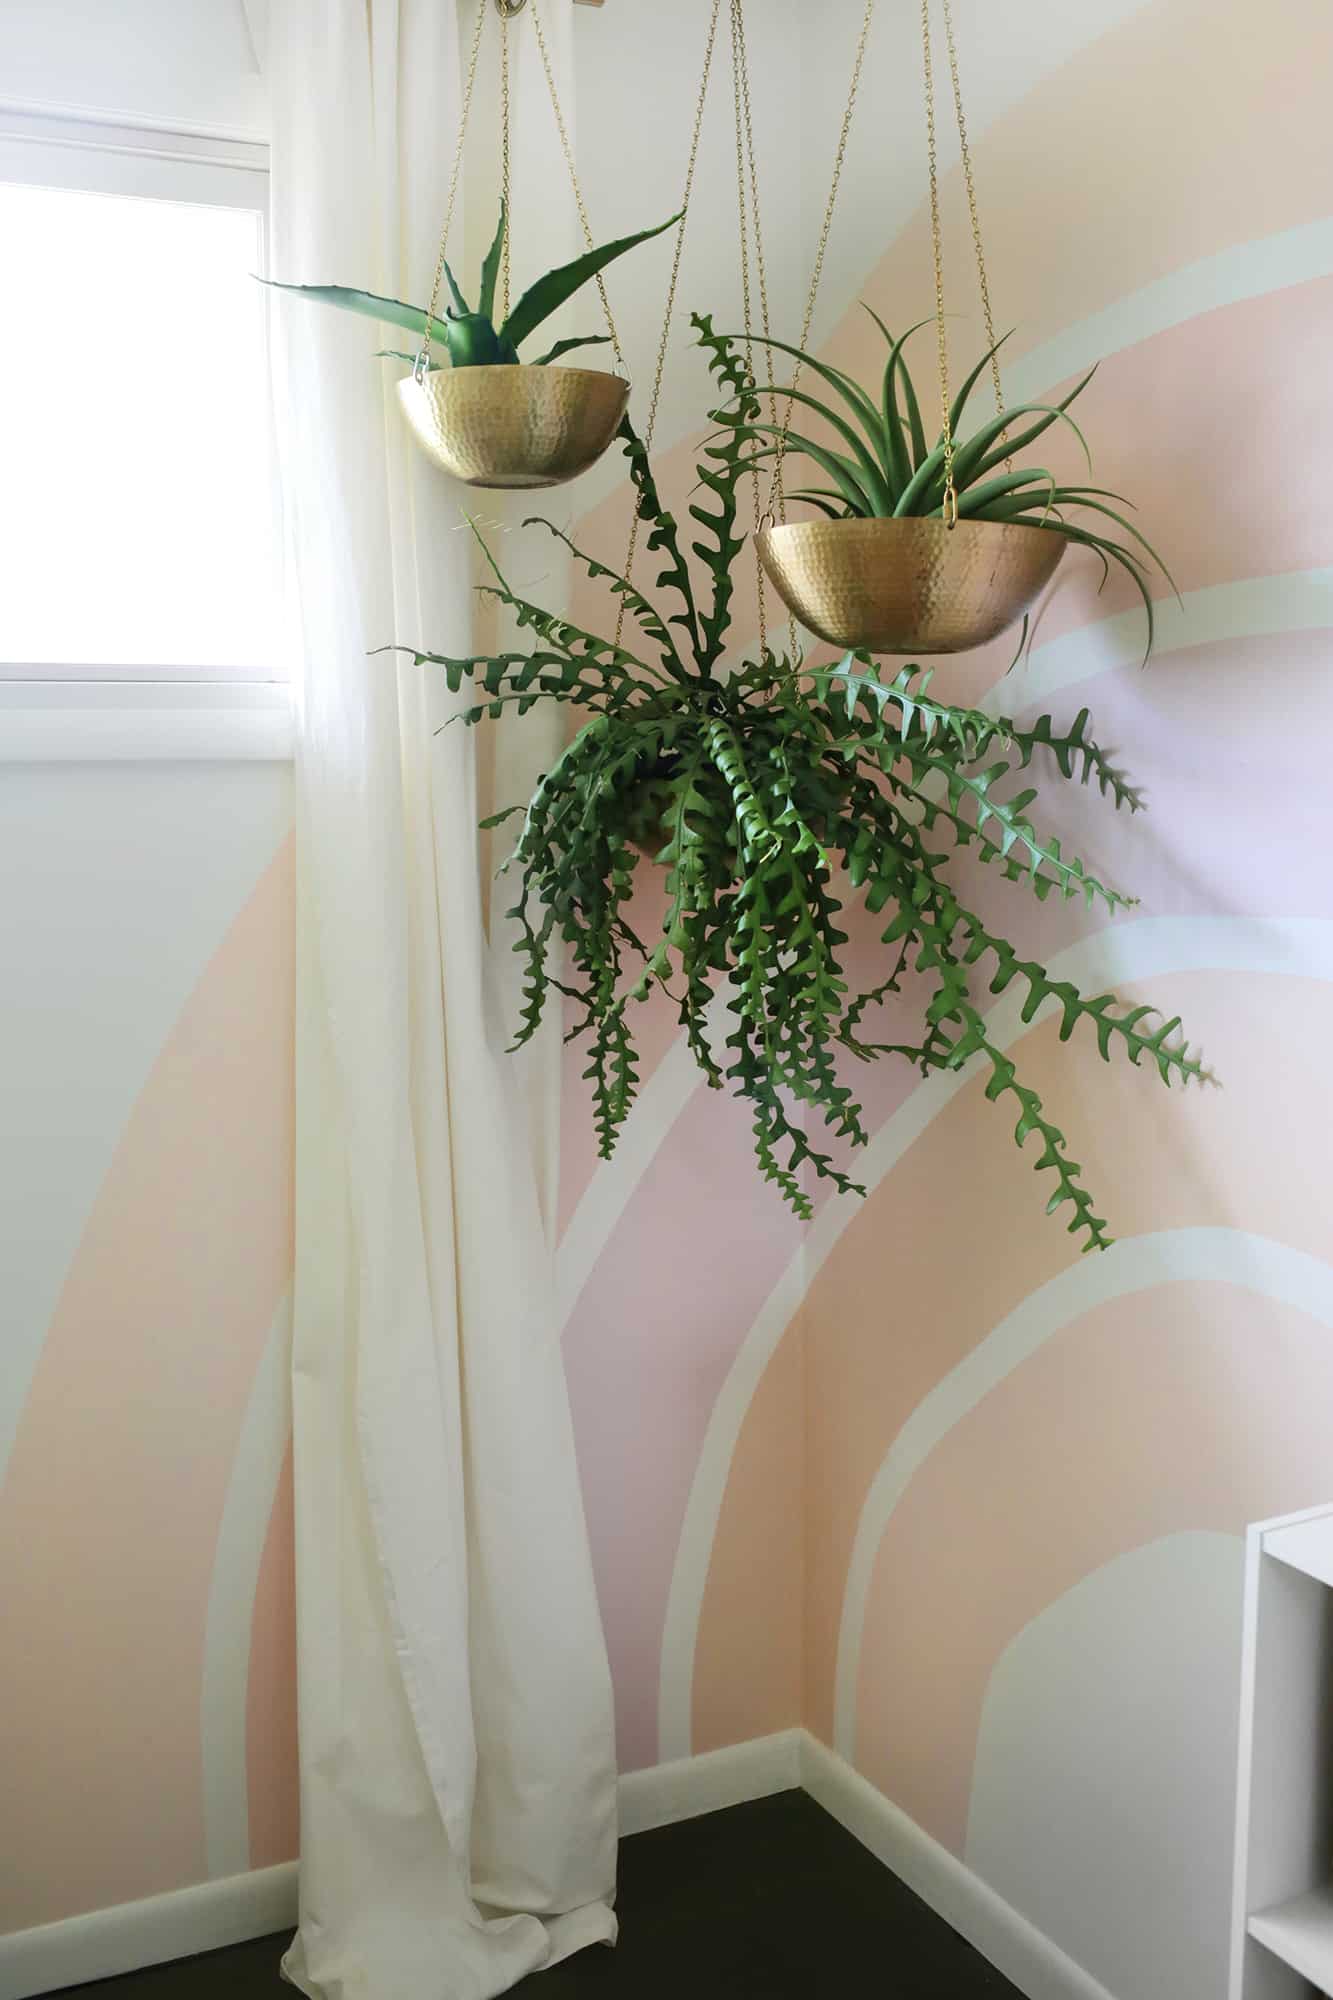
Since you mainly see the far corner of the playroom as you pass it in the hallway, I thought a similar corner rainbow would be perfect for the playroom happy vibes. Of course, I had to add a little more pink shades to the color mix as I just couldn’t help myself.
Related: 10 Statement Wall Ideas and Oversized Rainbow Wall Hanging DIY
 Supplies:
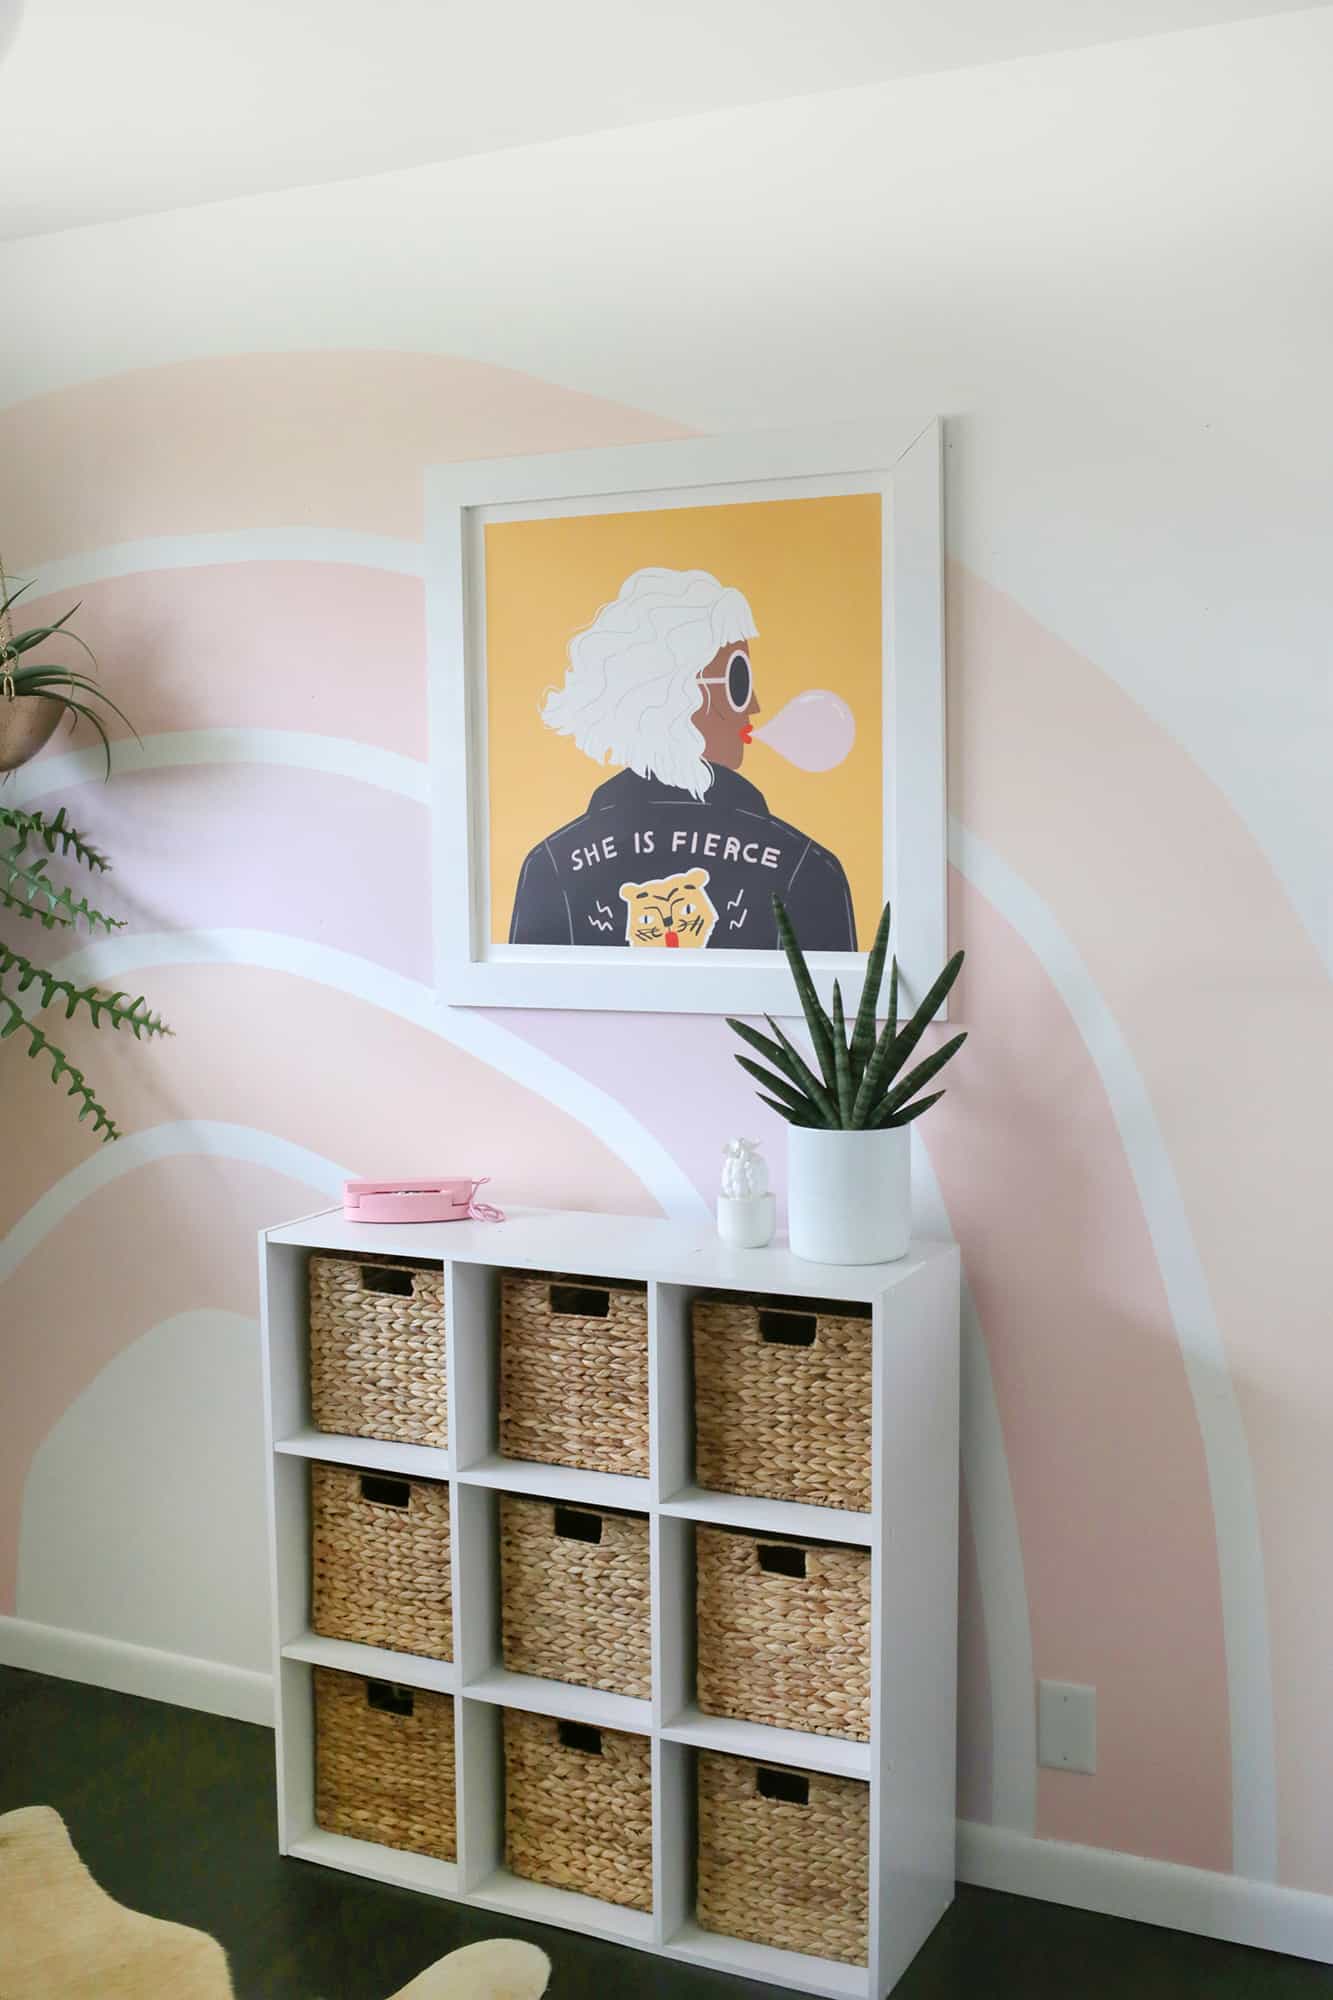
-paint in various shades for each rainbow strip (I used from top to bottom Valapar’s Champagne Pink, Baby Blush, Opal Blush, Warm Cappuccino, and Pink Wink)
–painter’s tape
-scissors
-white paint (or whatever color your main wall color is)
-paint brushes and rollers (I love these brushes)
-cardboard and light colored color pencil for guide
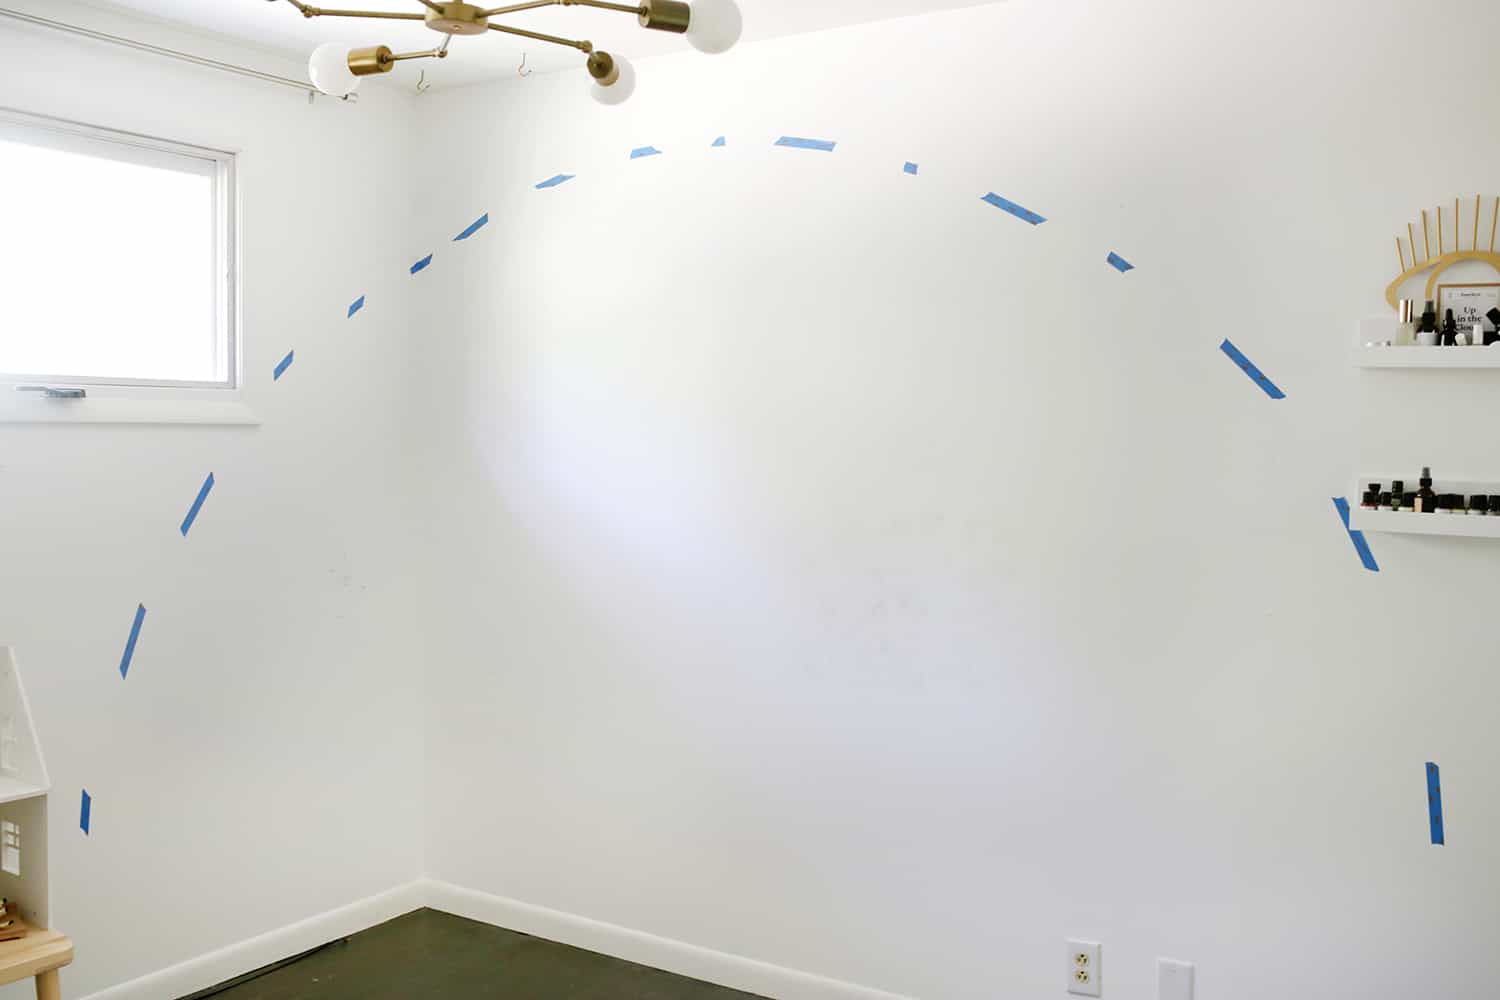
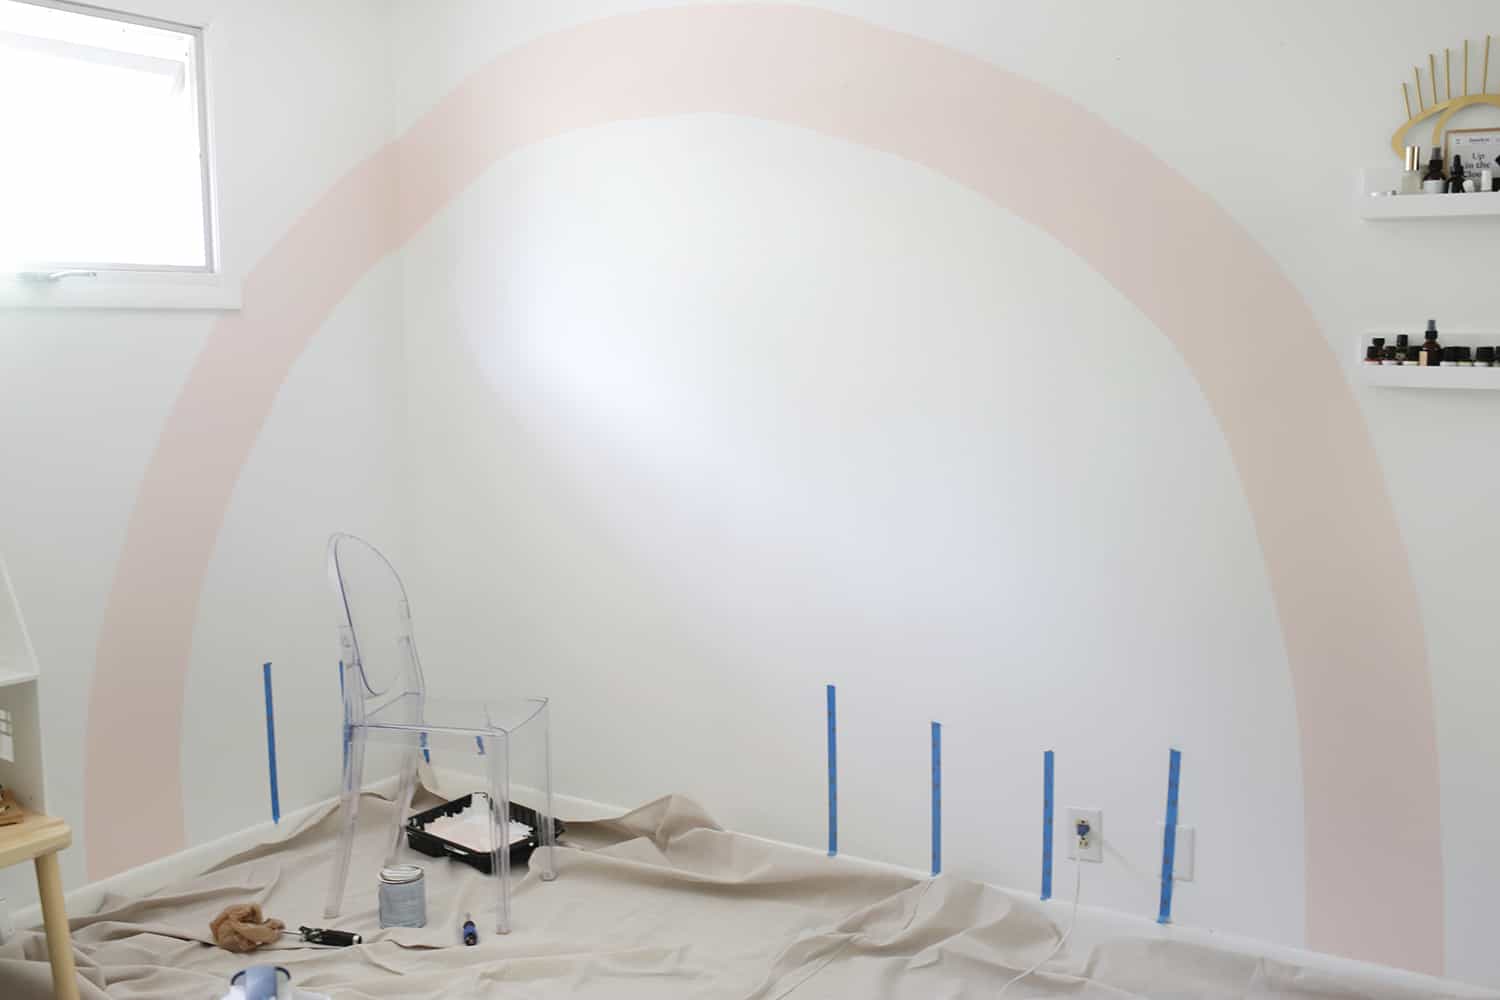
First, you’ll want to use pieces of painter’s tape to make the largest arch of your rainbow.
I would tape where you want both sides to end, then put tape at the highest point where you want the middle of the arch to be, and then fill in the rest from there. You can make your rainbow tall and skinny, fat and wide, lopsided—whatever you want!
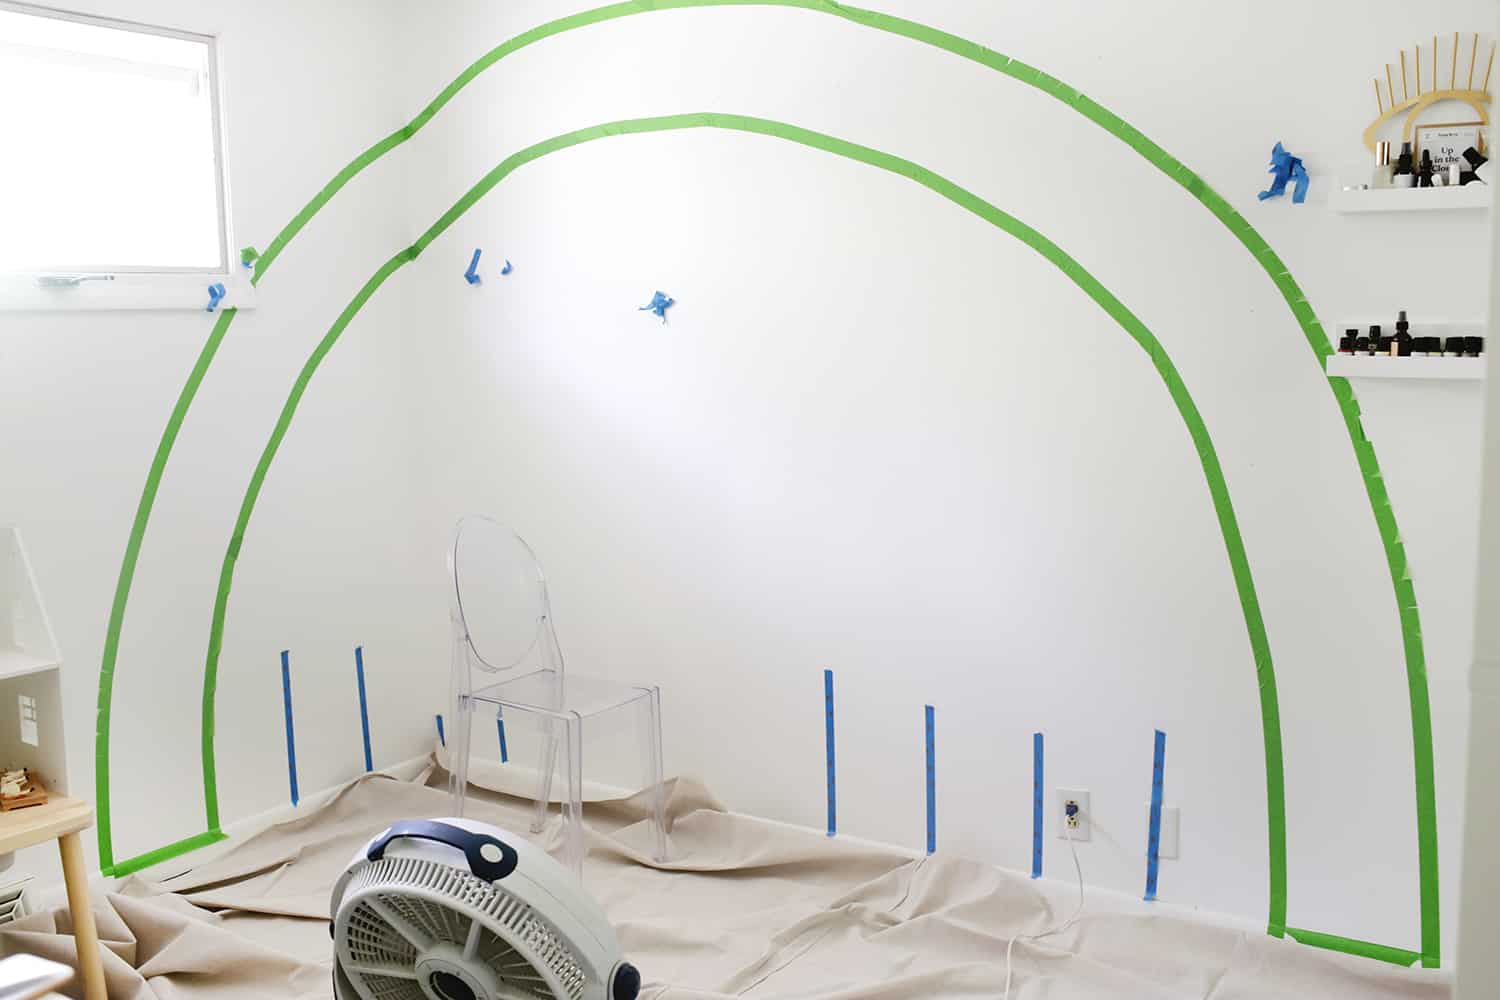 Once you get a general outline of where your outer rainbow band will be, you can play connect the dots with the tape and get your outer edge taped off.
Depending on how many colors you want to use in your rainbow, you’ll need to decide how wide you want each rainbow stripe to be.
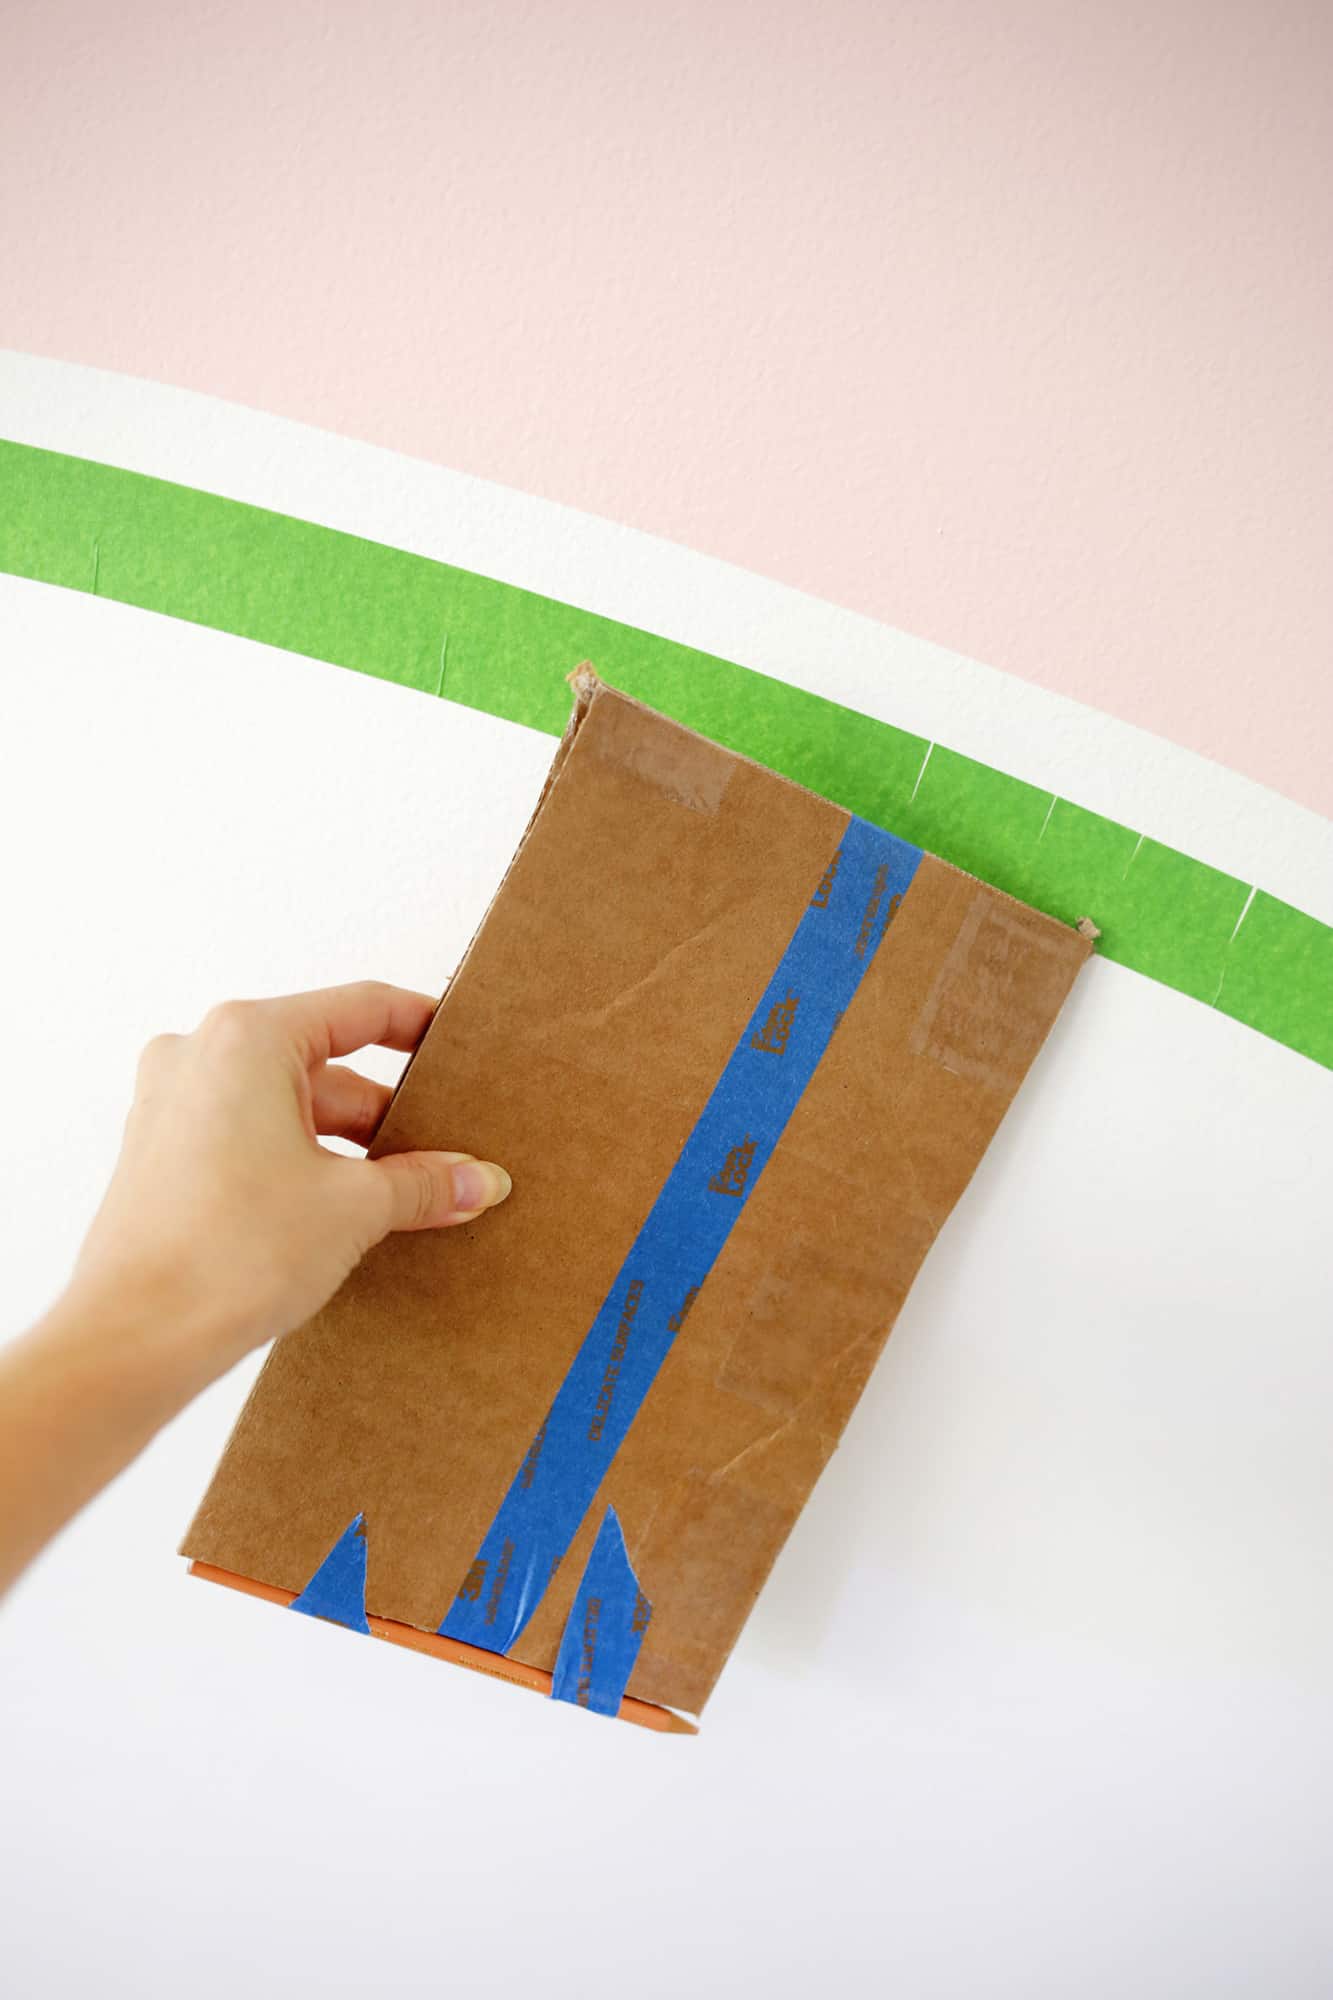 I wanted my stripes 10″ wide, so I cut a 10″ piece of cardboard and then taped a very light pink colored pencil to the other side so I could trace a 10″ gap and know where to place the next strip of painter’s tape.
I suggest using a very light colored pencil for this as I’ve had too many instances of using regular pencils for marking where it was difficult to cover over with my light colored paint.
Use your width tracer and run the non-pencil side against the tape mark of your rainbow band so it creates another line 10″ away. Use your painter’s tape to tape just on the outside of the pencil mark so your marks will be painted over and hidden.
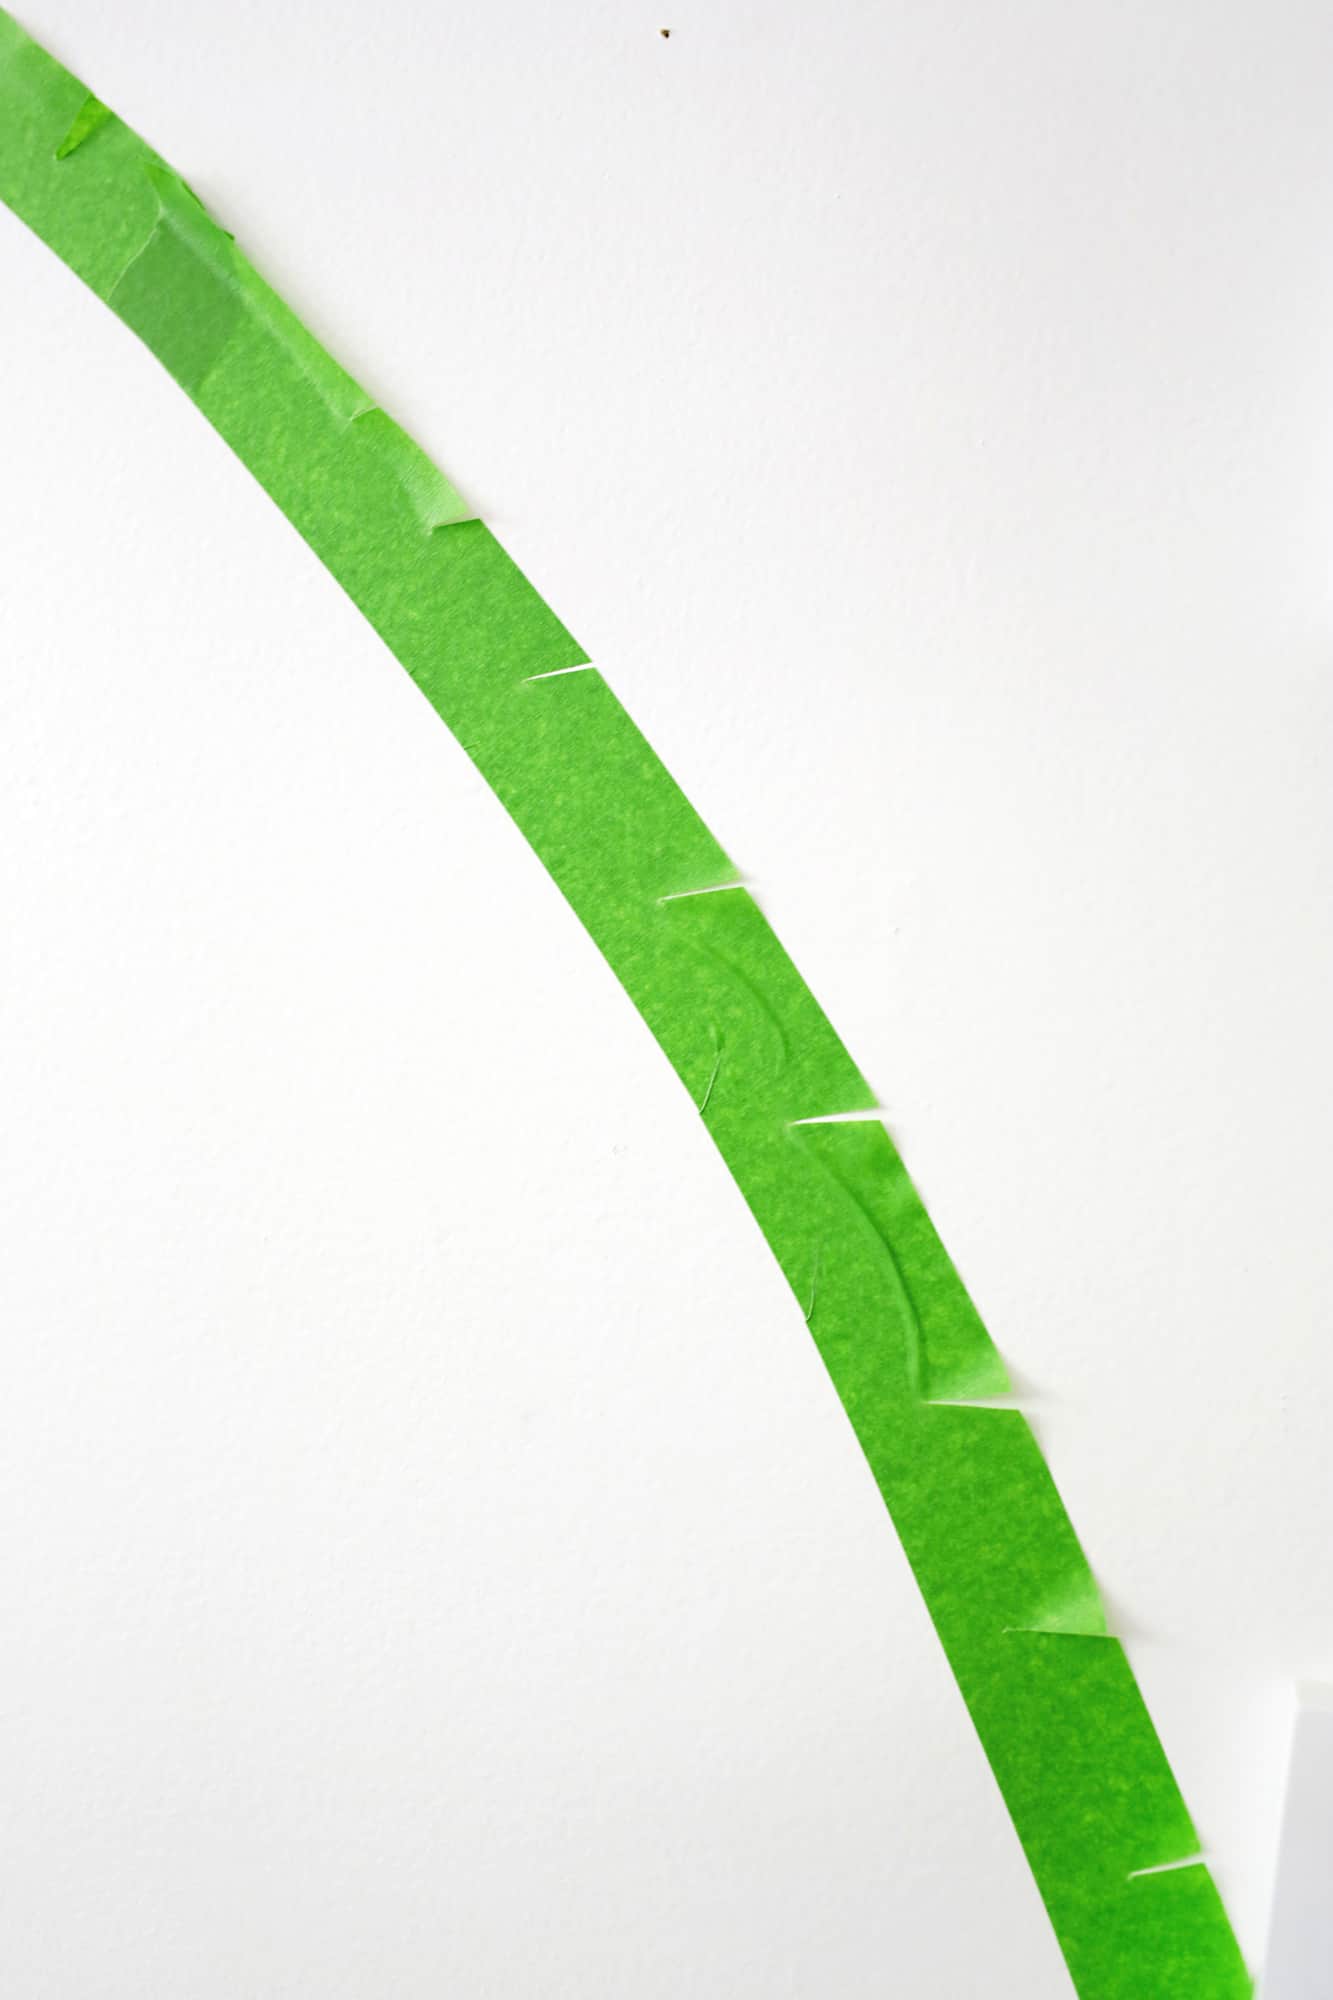 It can be a little difficult to make an arch with straight painter’s tape, so I would either suggest cutting a piece of tape down the middle so it’s a lot thinner (and easier to bend into an arch shape).
Or, you can make some cuts into the outside edge of the tape to about the halfway mark so you can bend the tape to your line more easily.
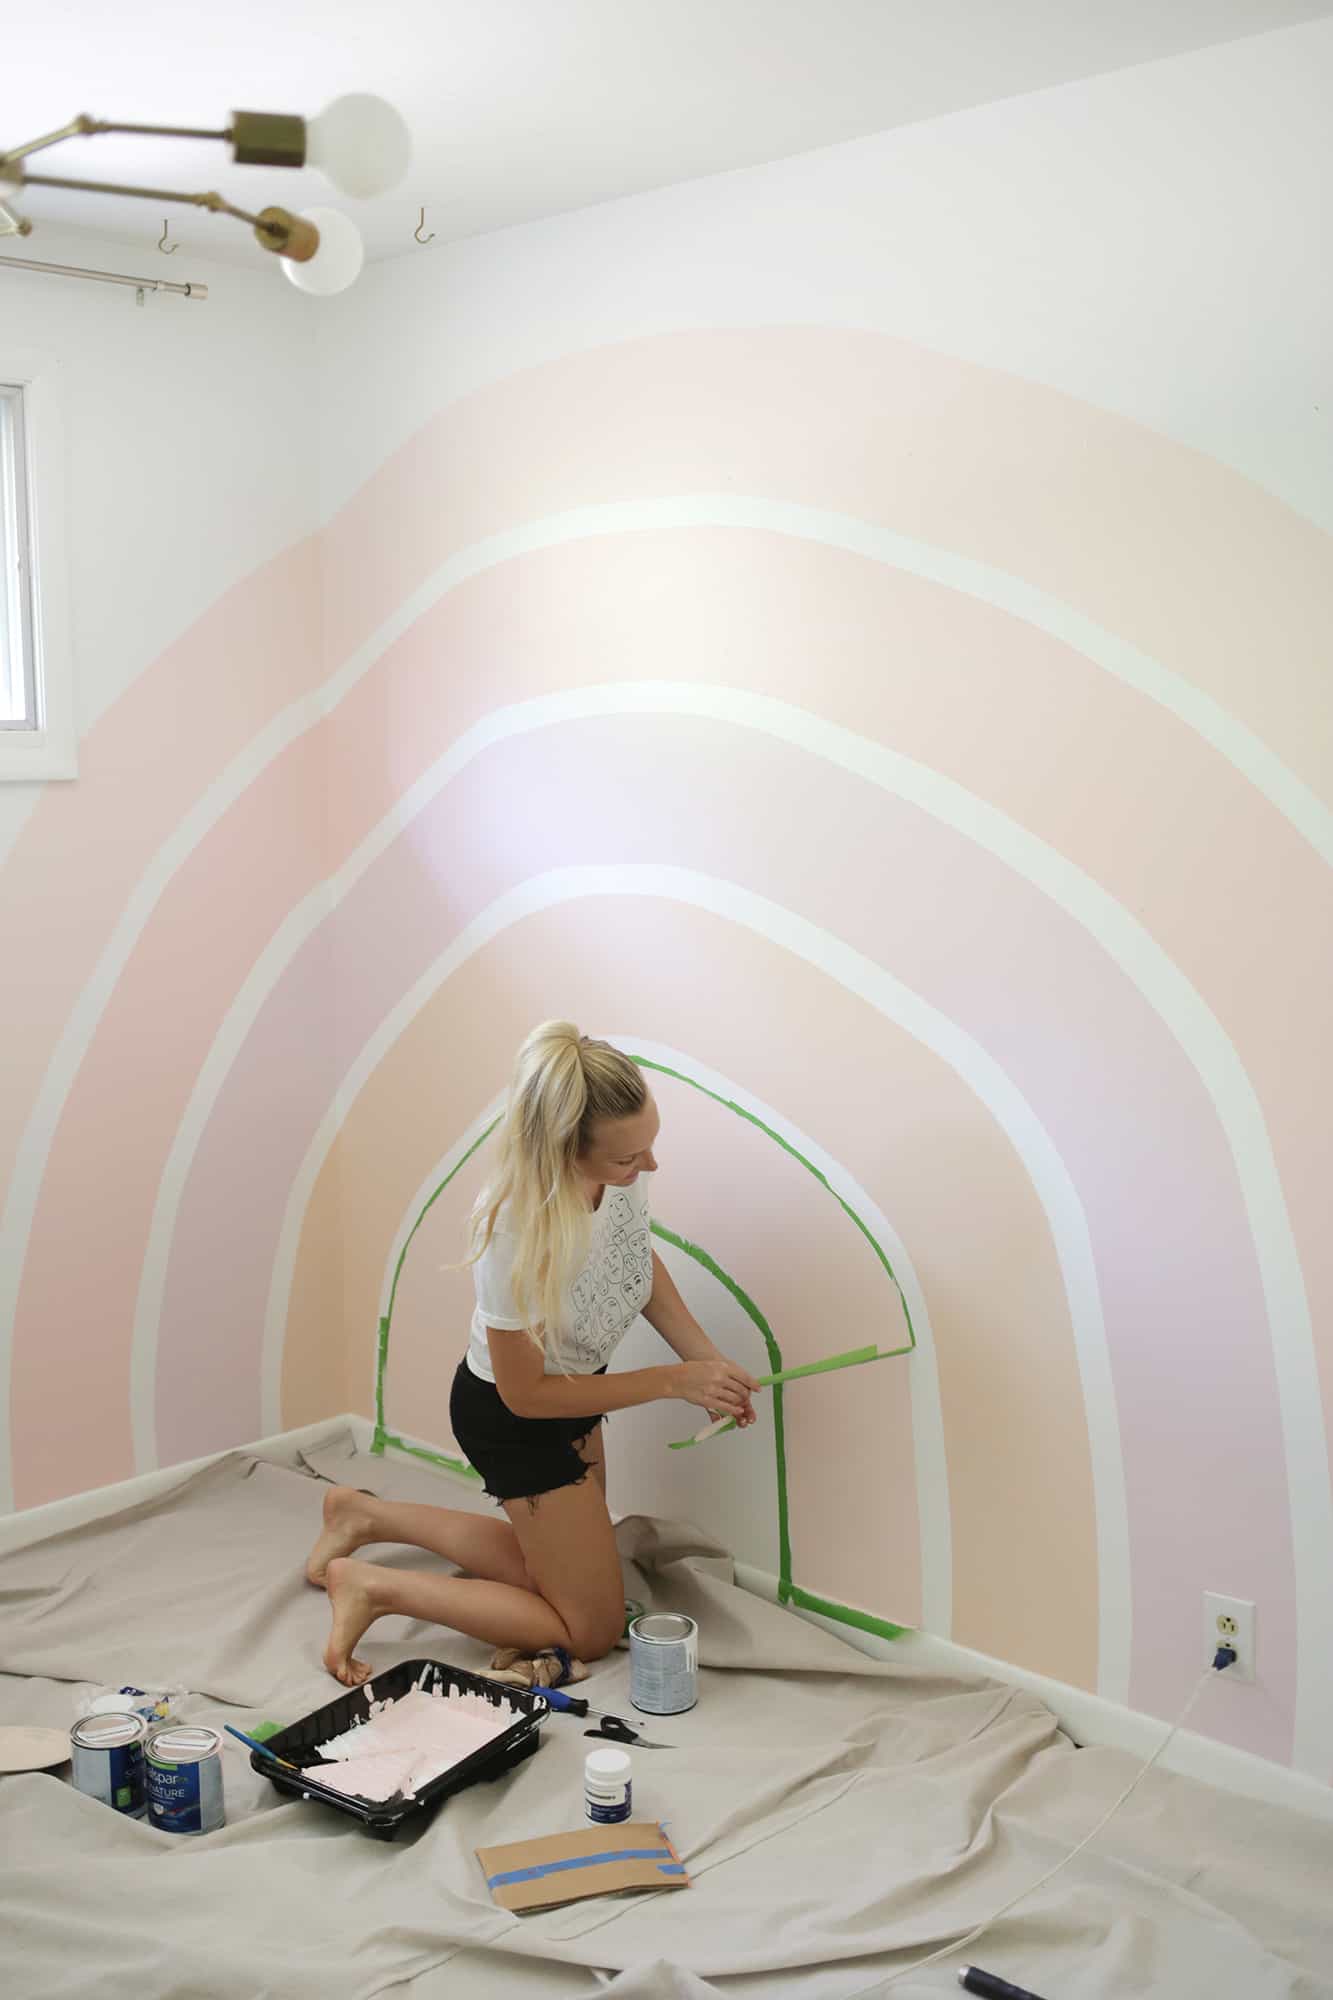
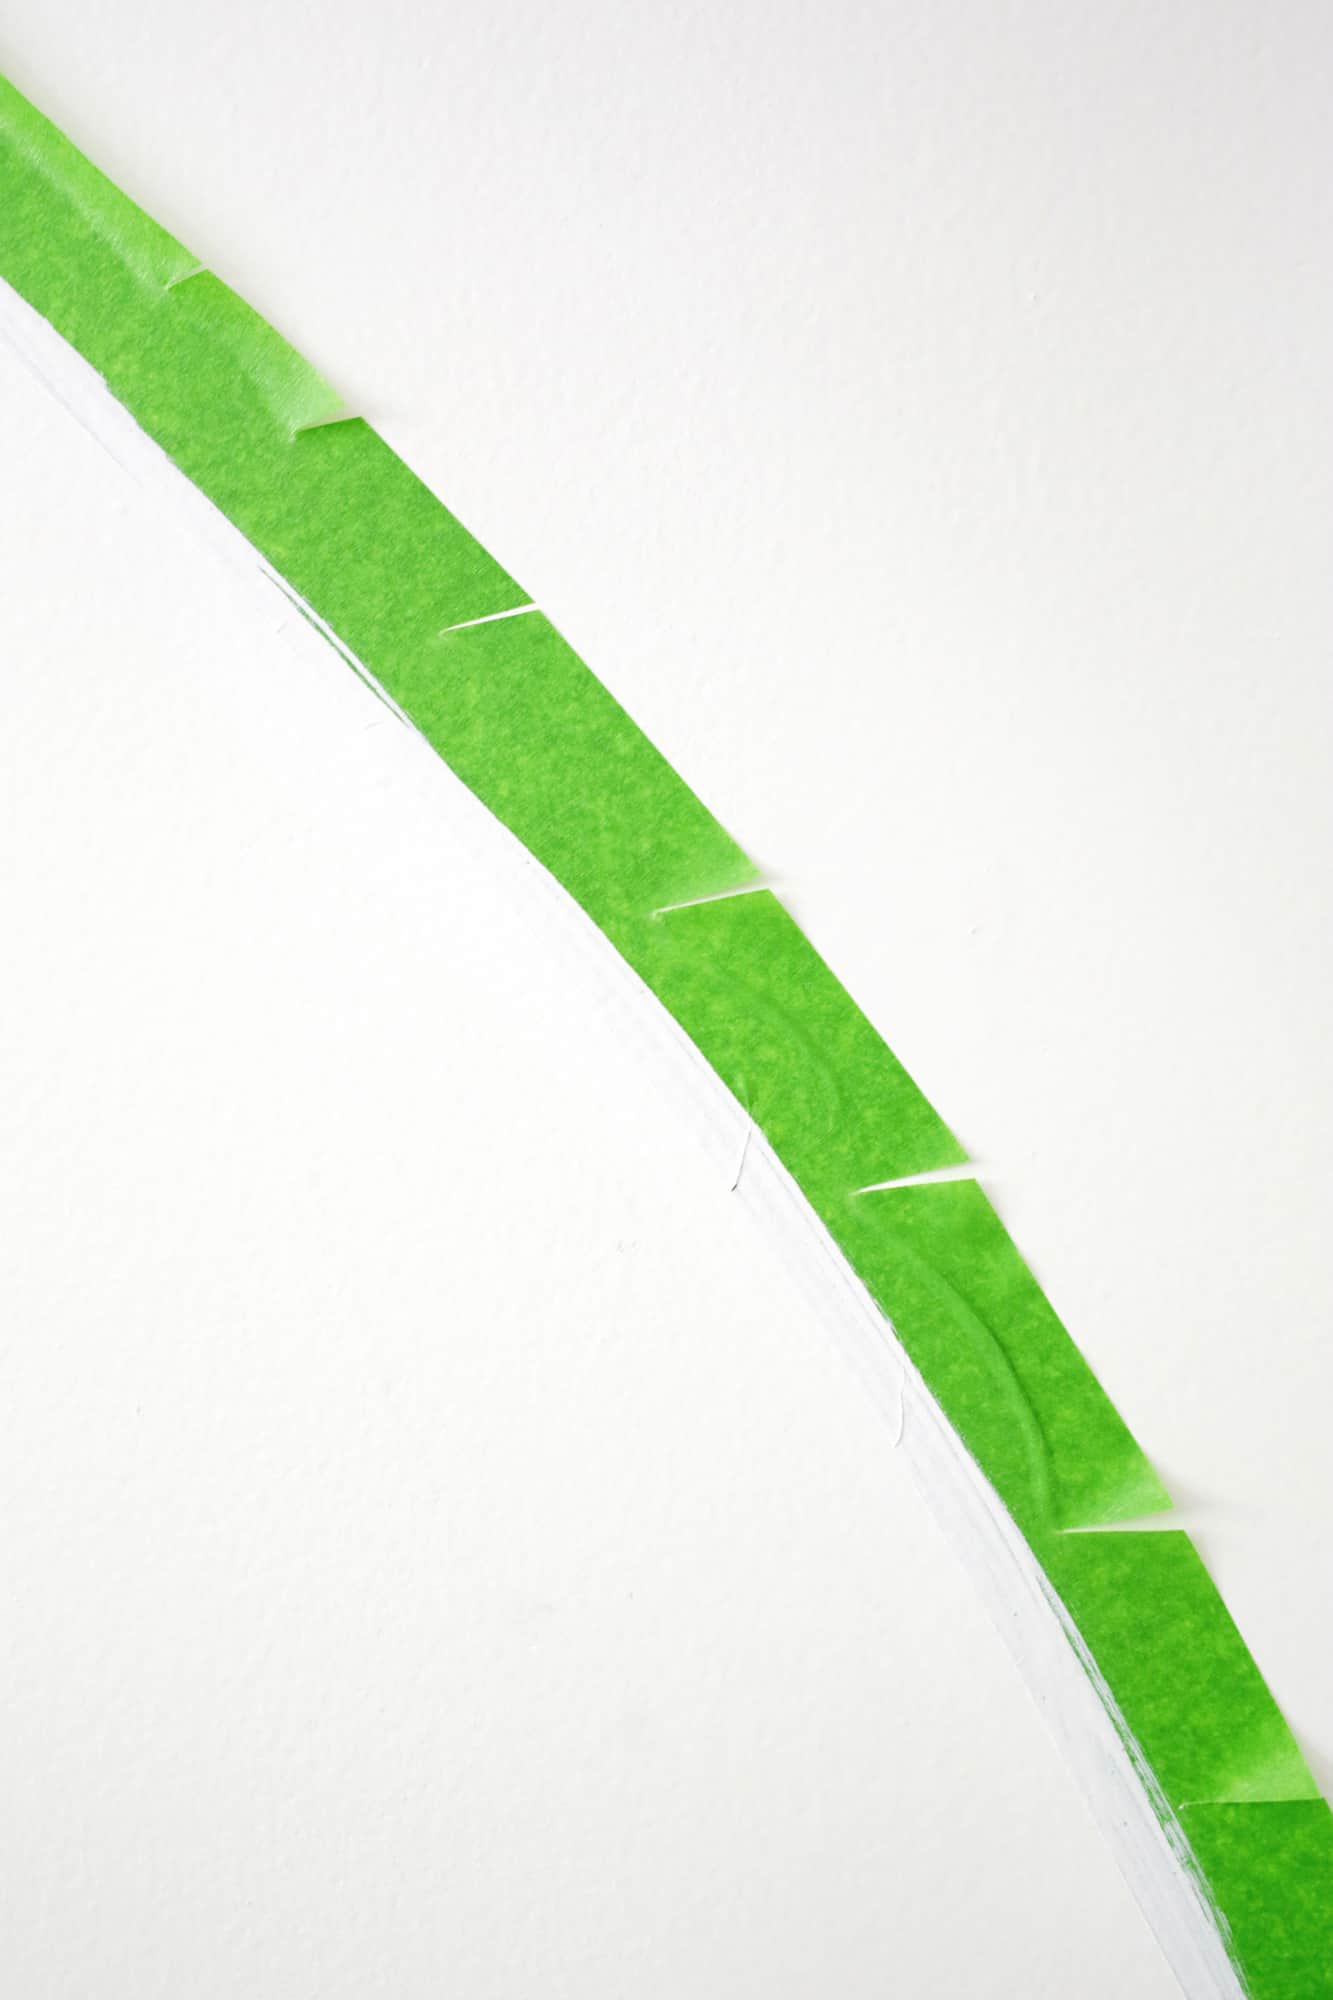 Once you get your first section taped off, you’ll want to take the main color of your wall (white in my case) and paint some of that color paint all along the edges of your rainbow band where the tape meets the rainbow.
It may seem like an unnecessary step, but using the wall color where the tape seam hits will actually give you the cleanest line of your rainbow color when you go to take the tape off!
Basically, if there is going to be any paint bleed on the tape line, the bleed will be the wall color and so it will disappear into the wall when you go to take the tape off. Believe me, I’ve done it without this step in the past and I’ll never skip it again! It works really well.
 Once your wall color is dry, paint your rainbow band color onto the stripe with as many coats as you need (with adequate dry time in between). Once your paint is dry, you can peel off the tape and your first stripe is done!
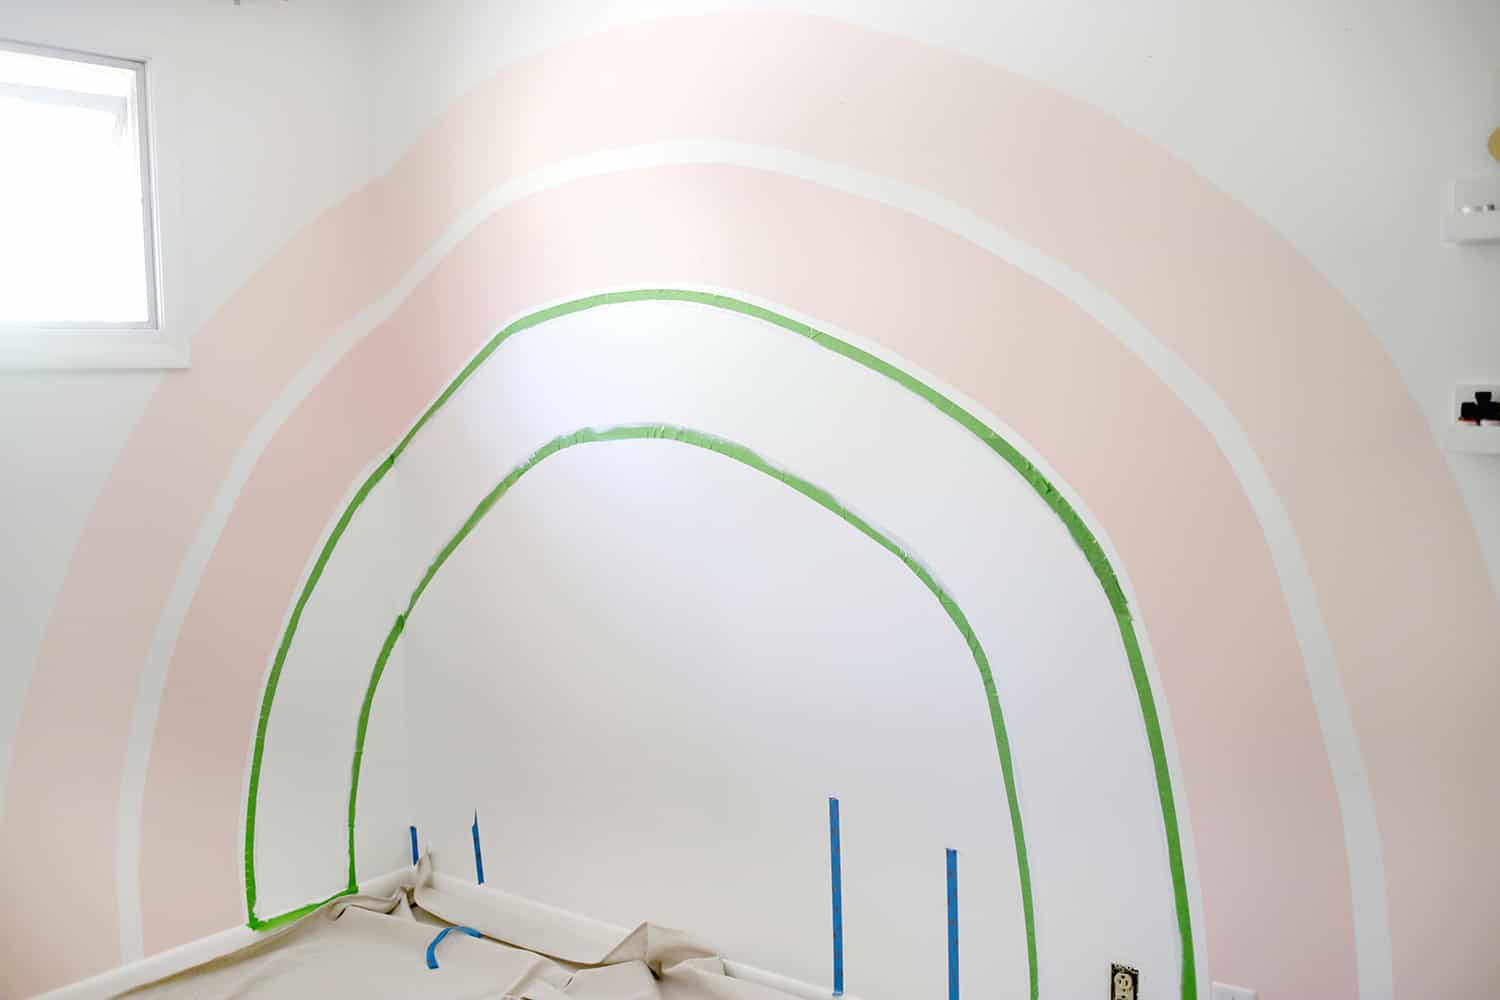
 Repeat by taping off the outer edge of the next layer and then using your cardboard width tracer to show you where the next tape line should be.
Tape your second line, paint with your wall color along the edges, and fill with your main color. Repeat until each layer of your rainbow is done.
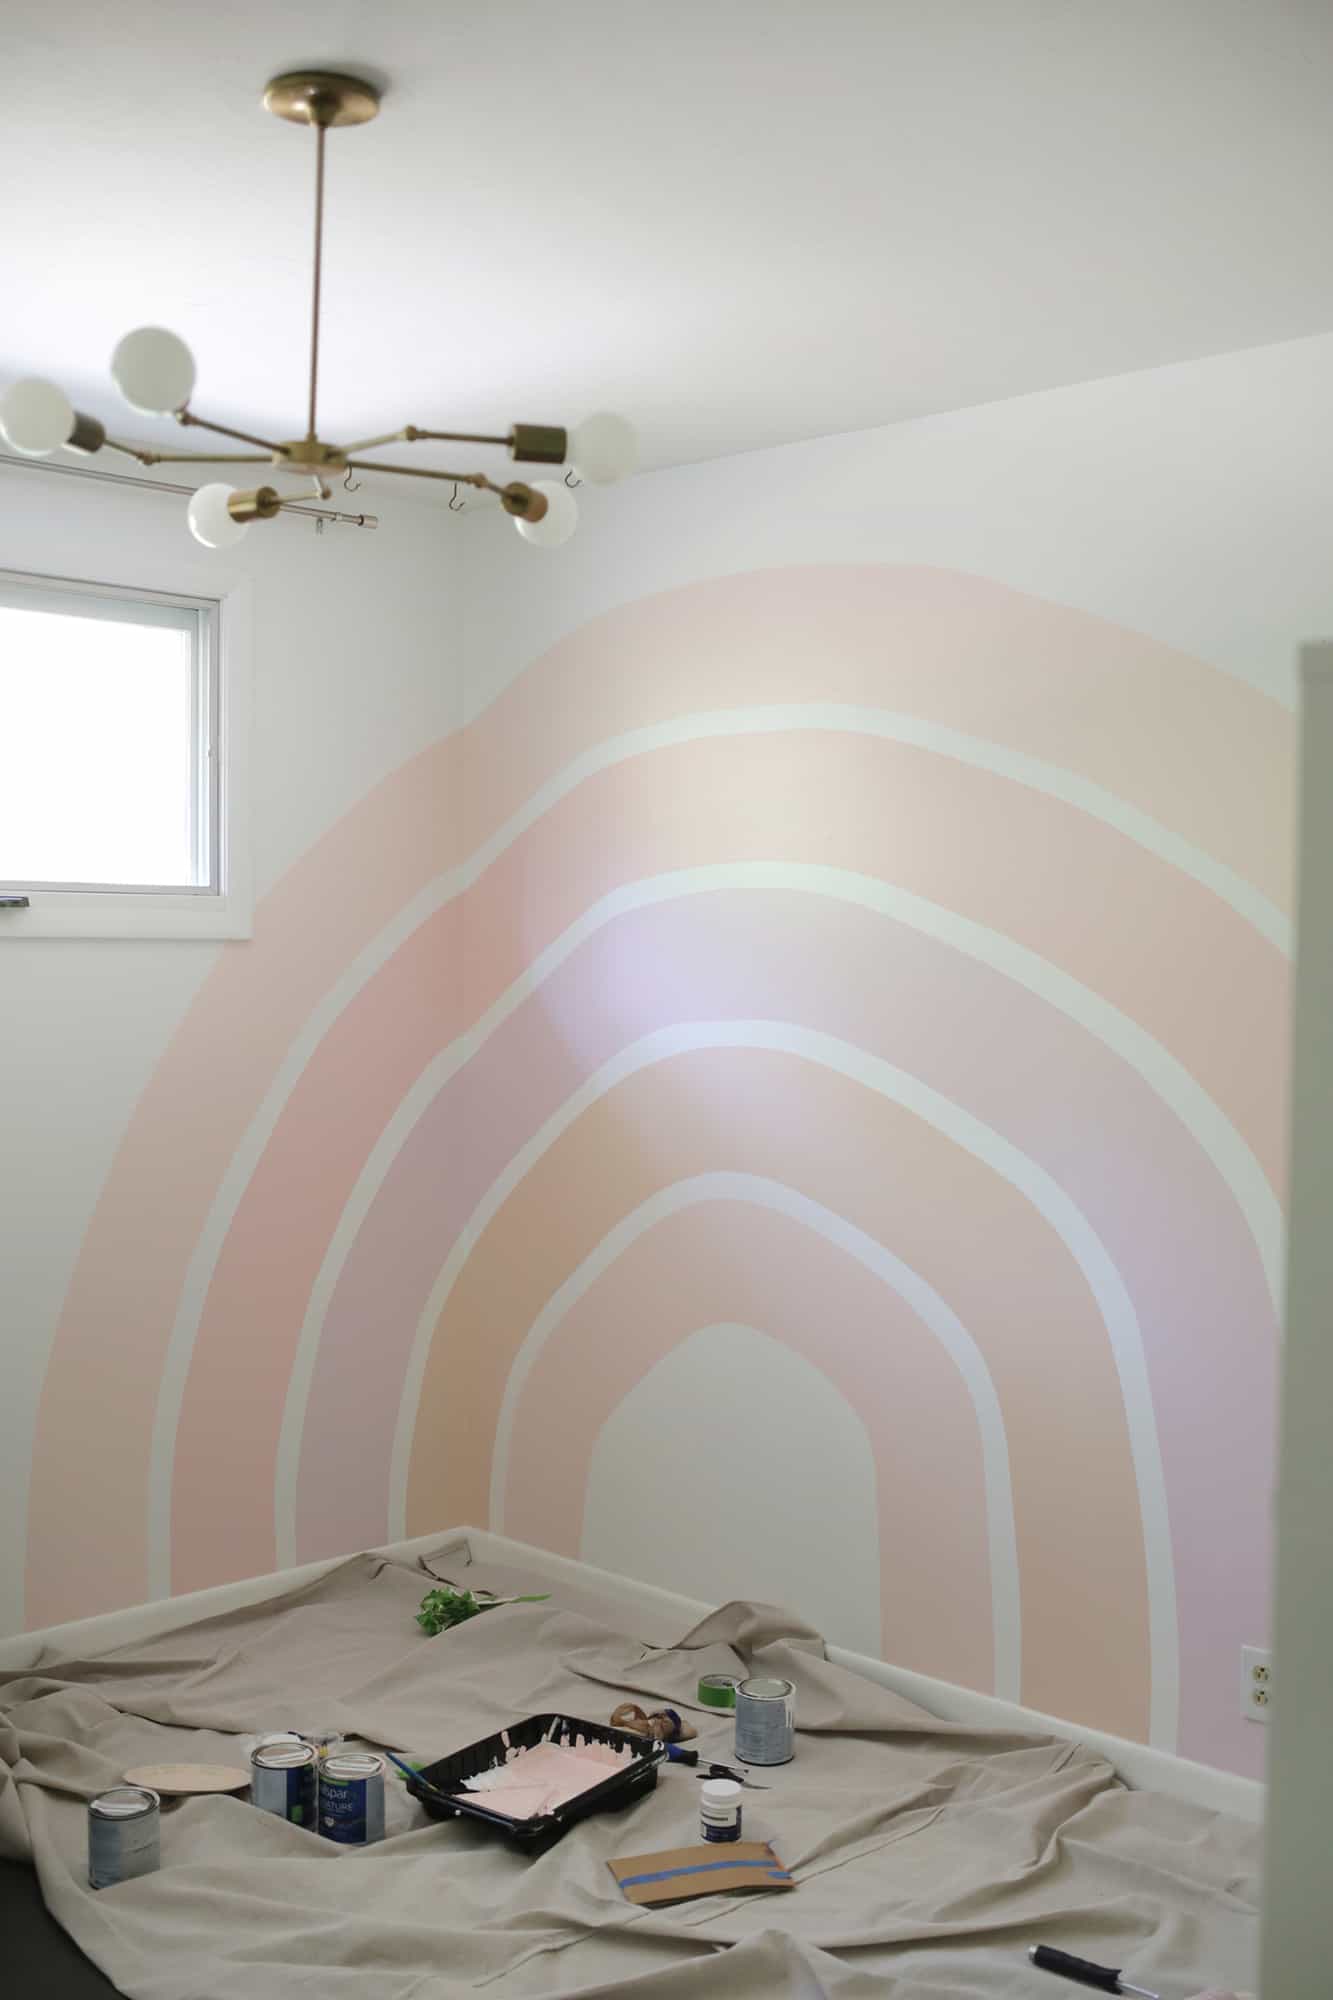 You are welcome to measure out precisely the space between each rainbow band so they are all perfectly spaced, or you can just eyeball it like I did. I’d say it came out really cute without having to spend a lot of time trying to make it all perfect.
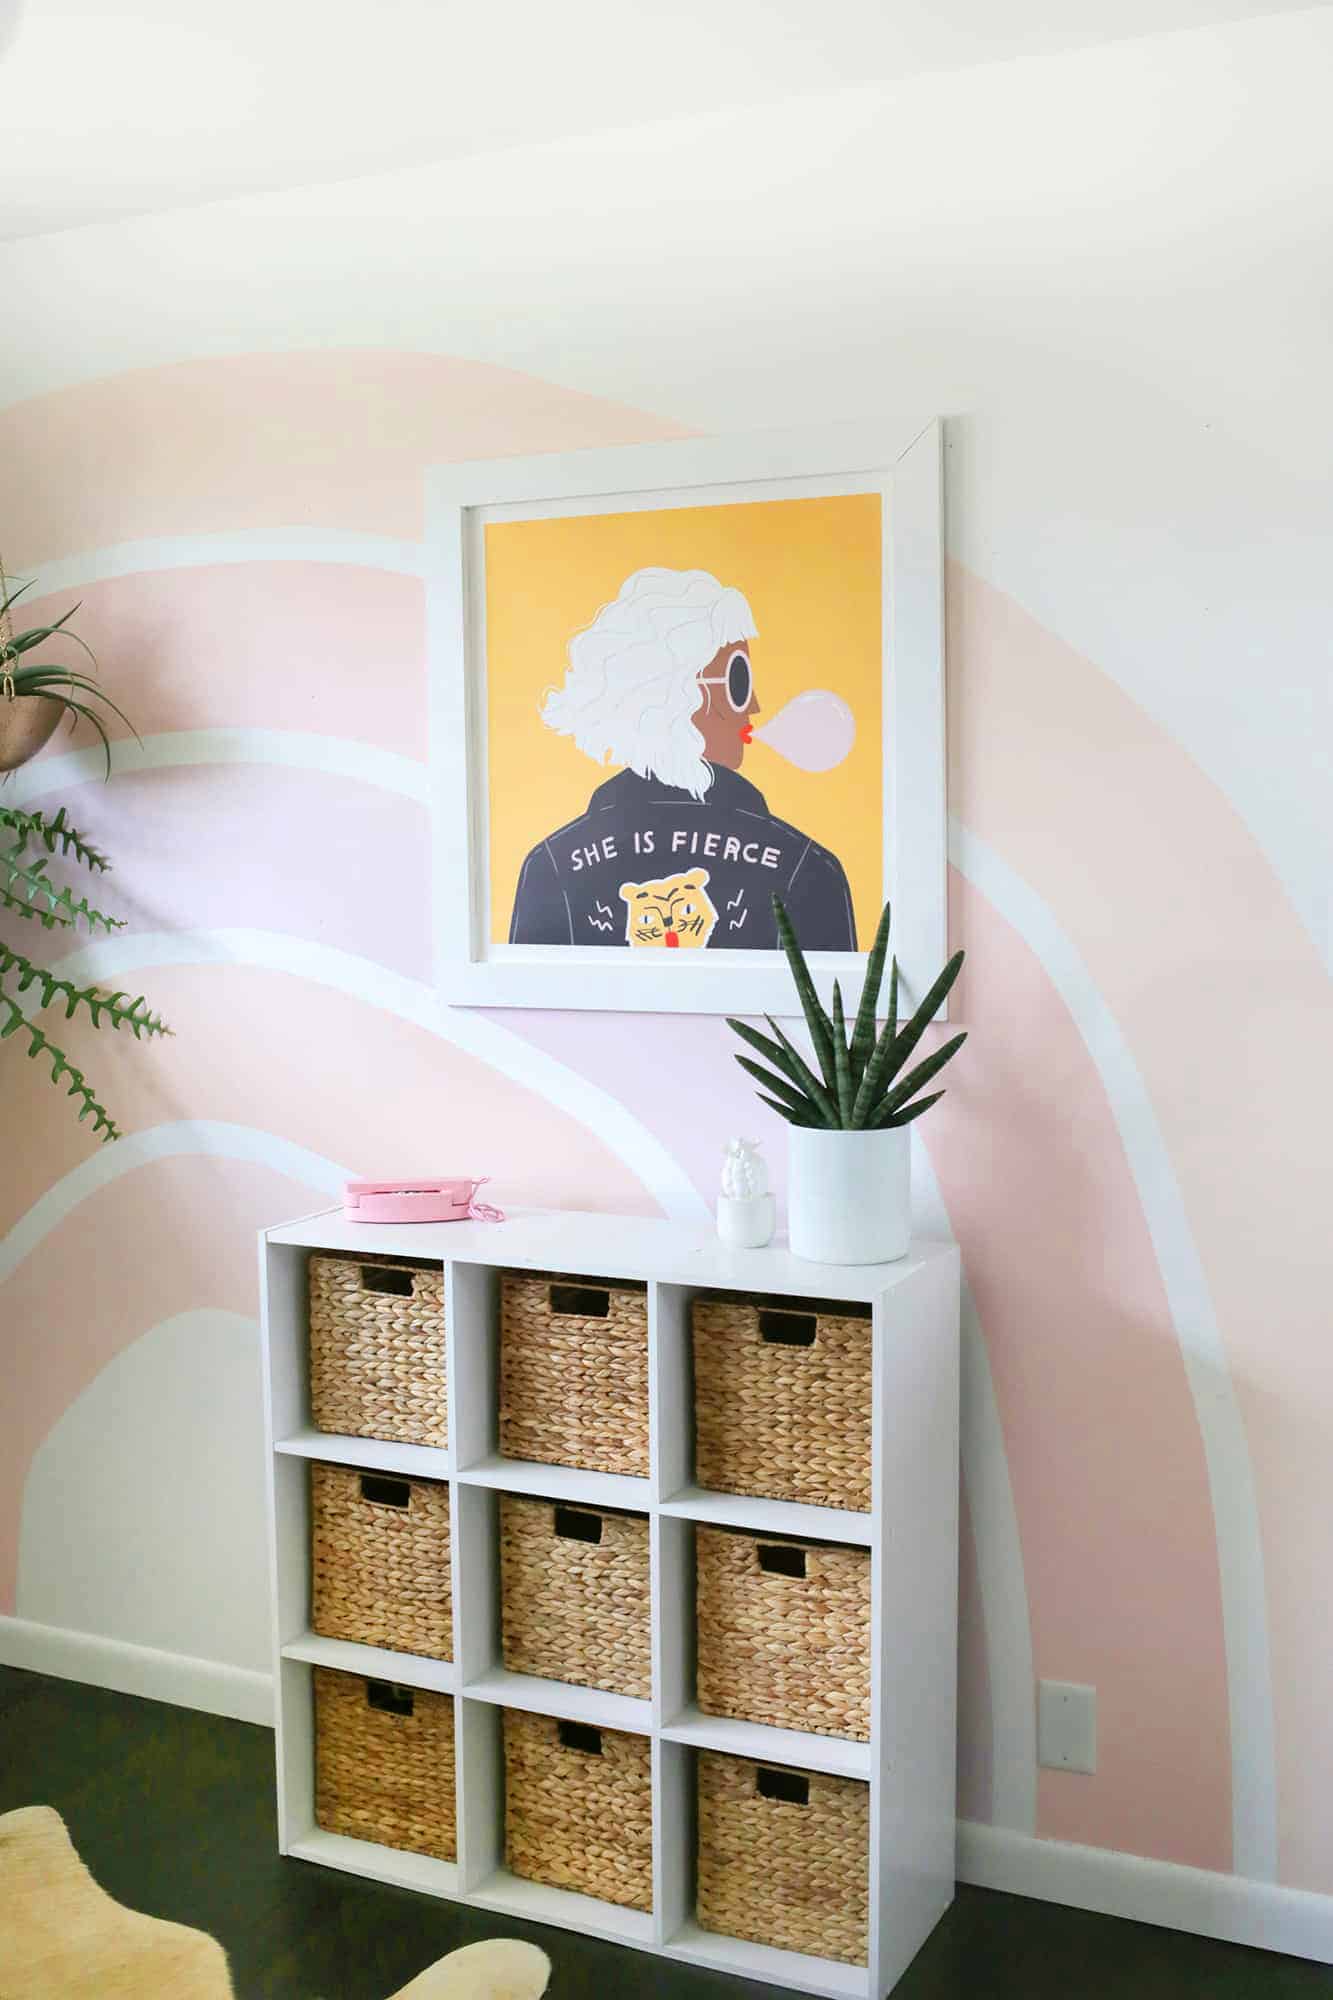
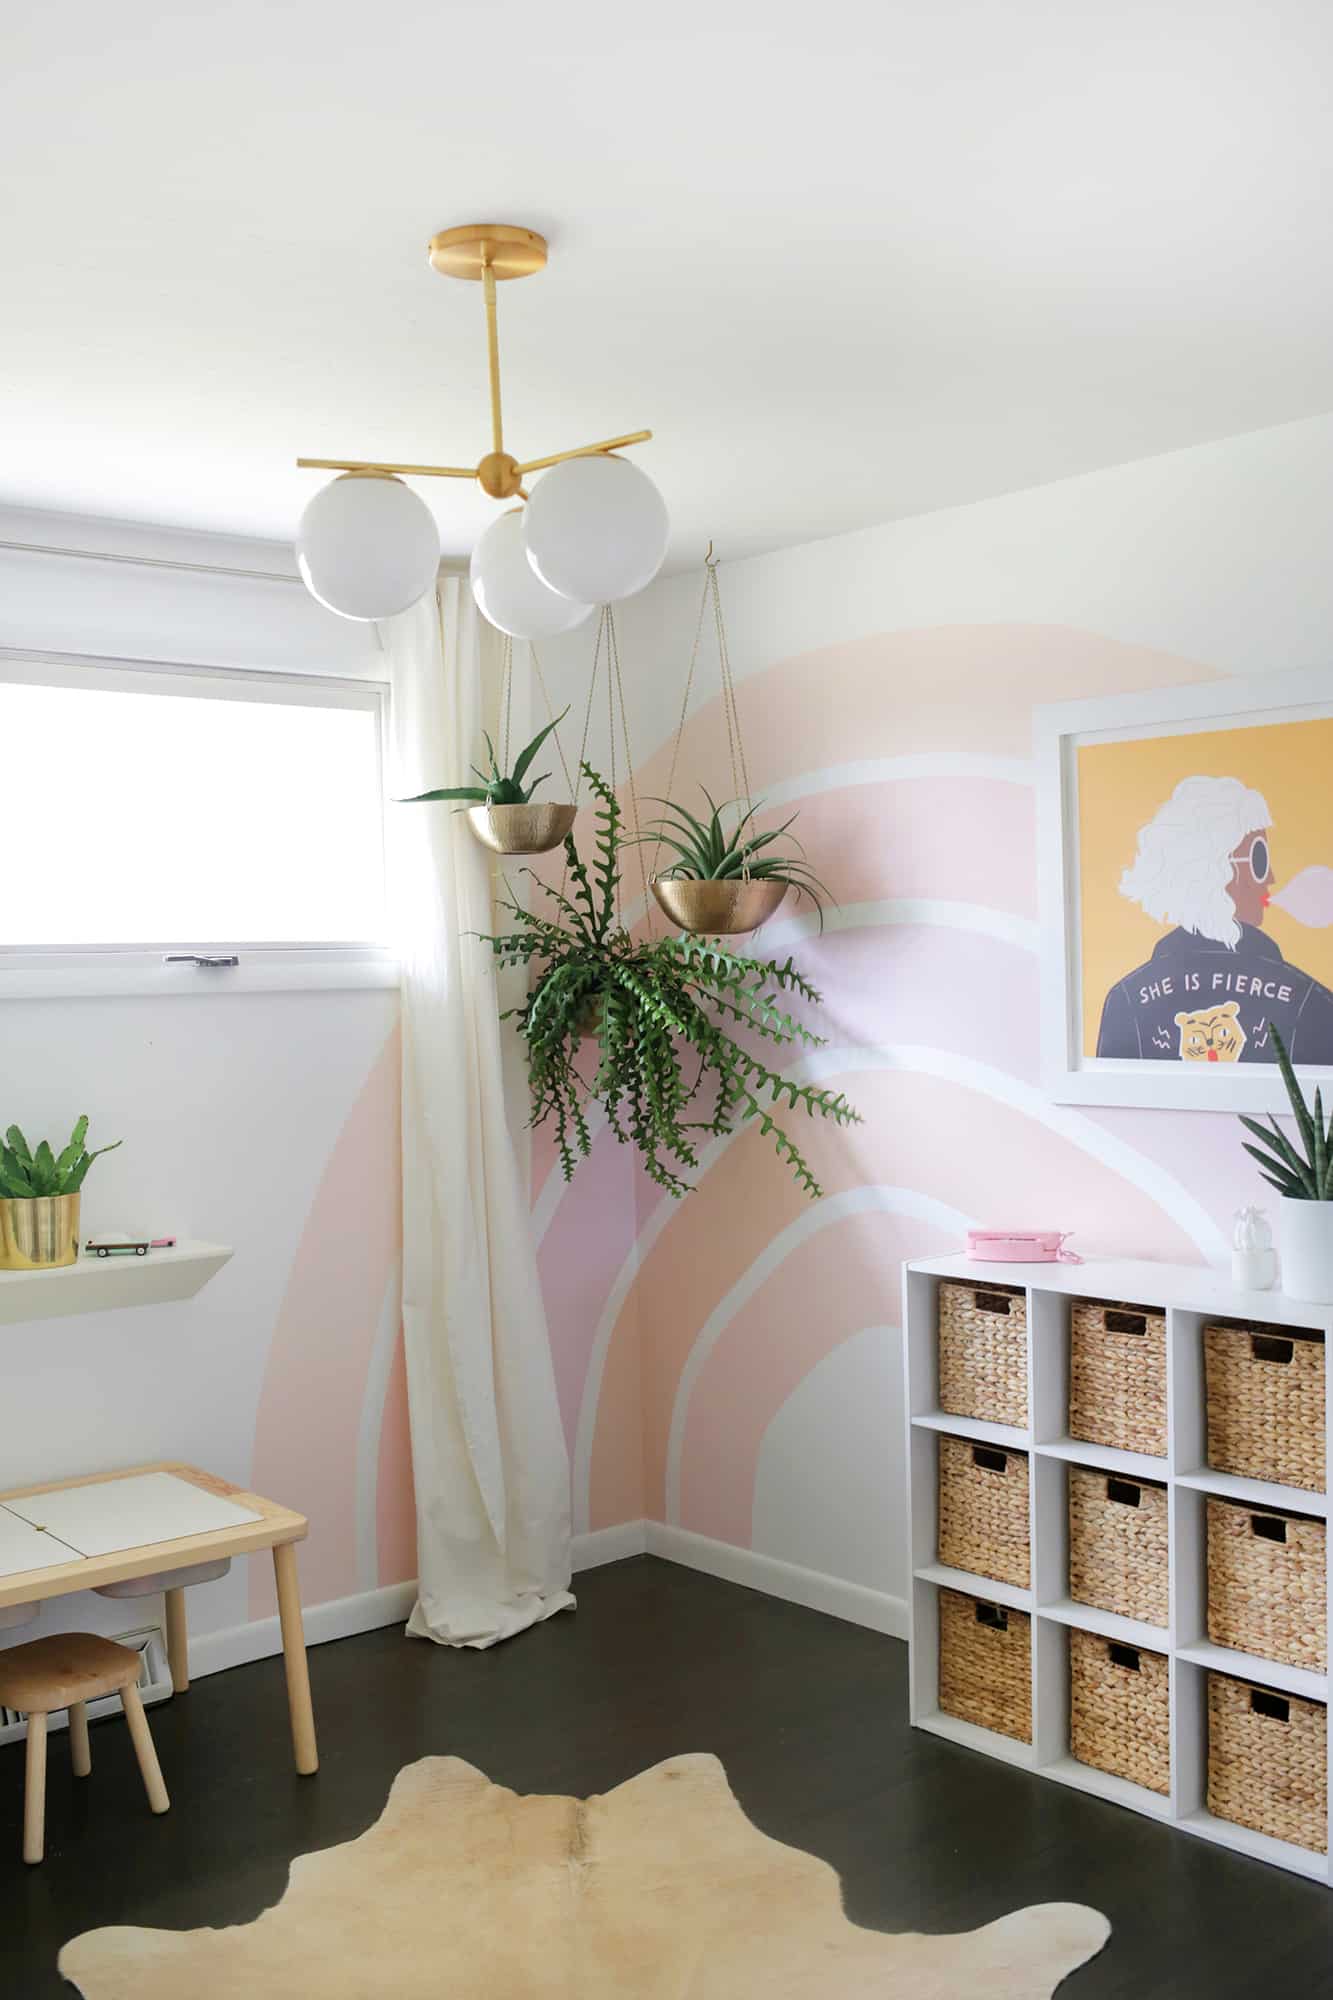
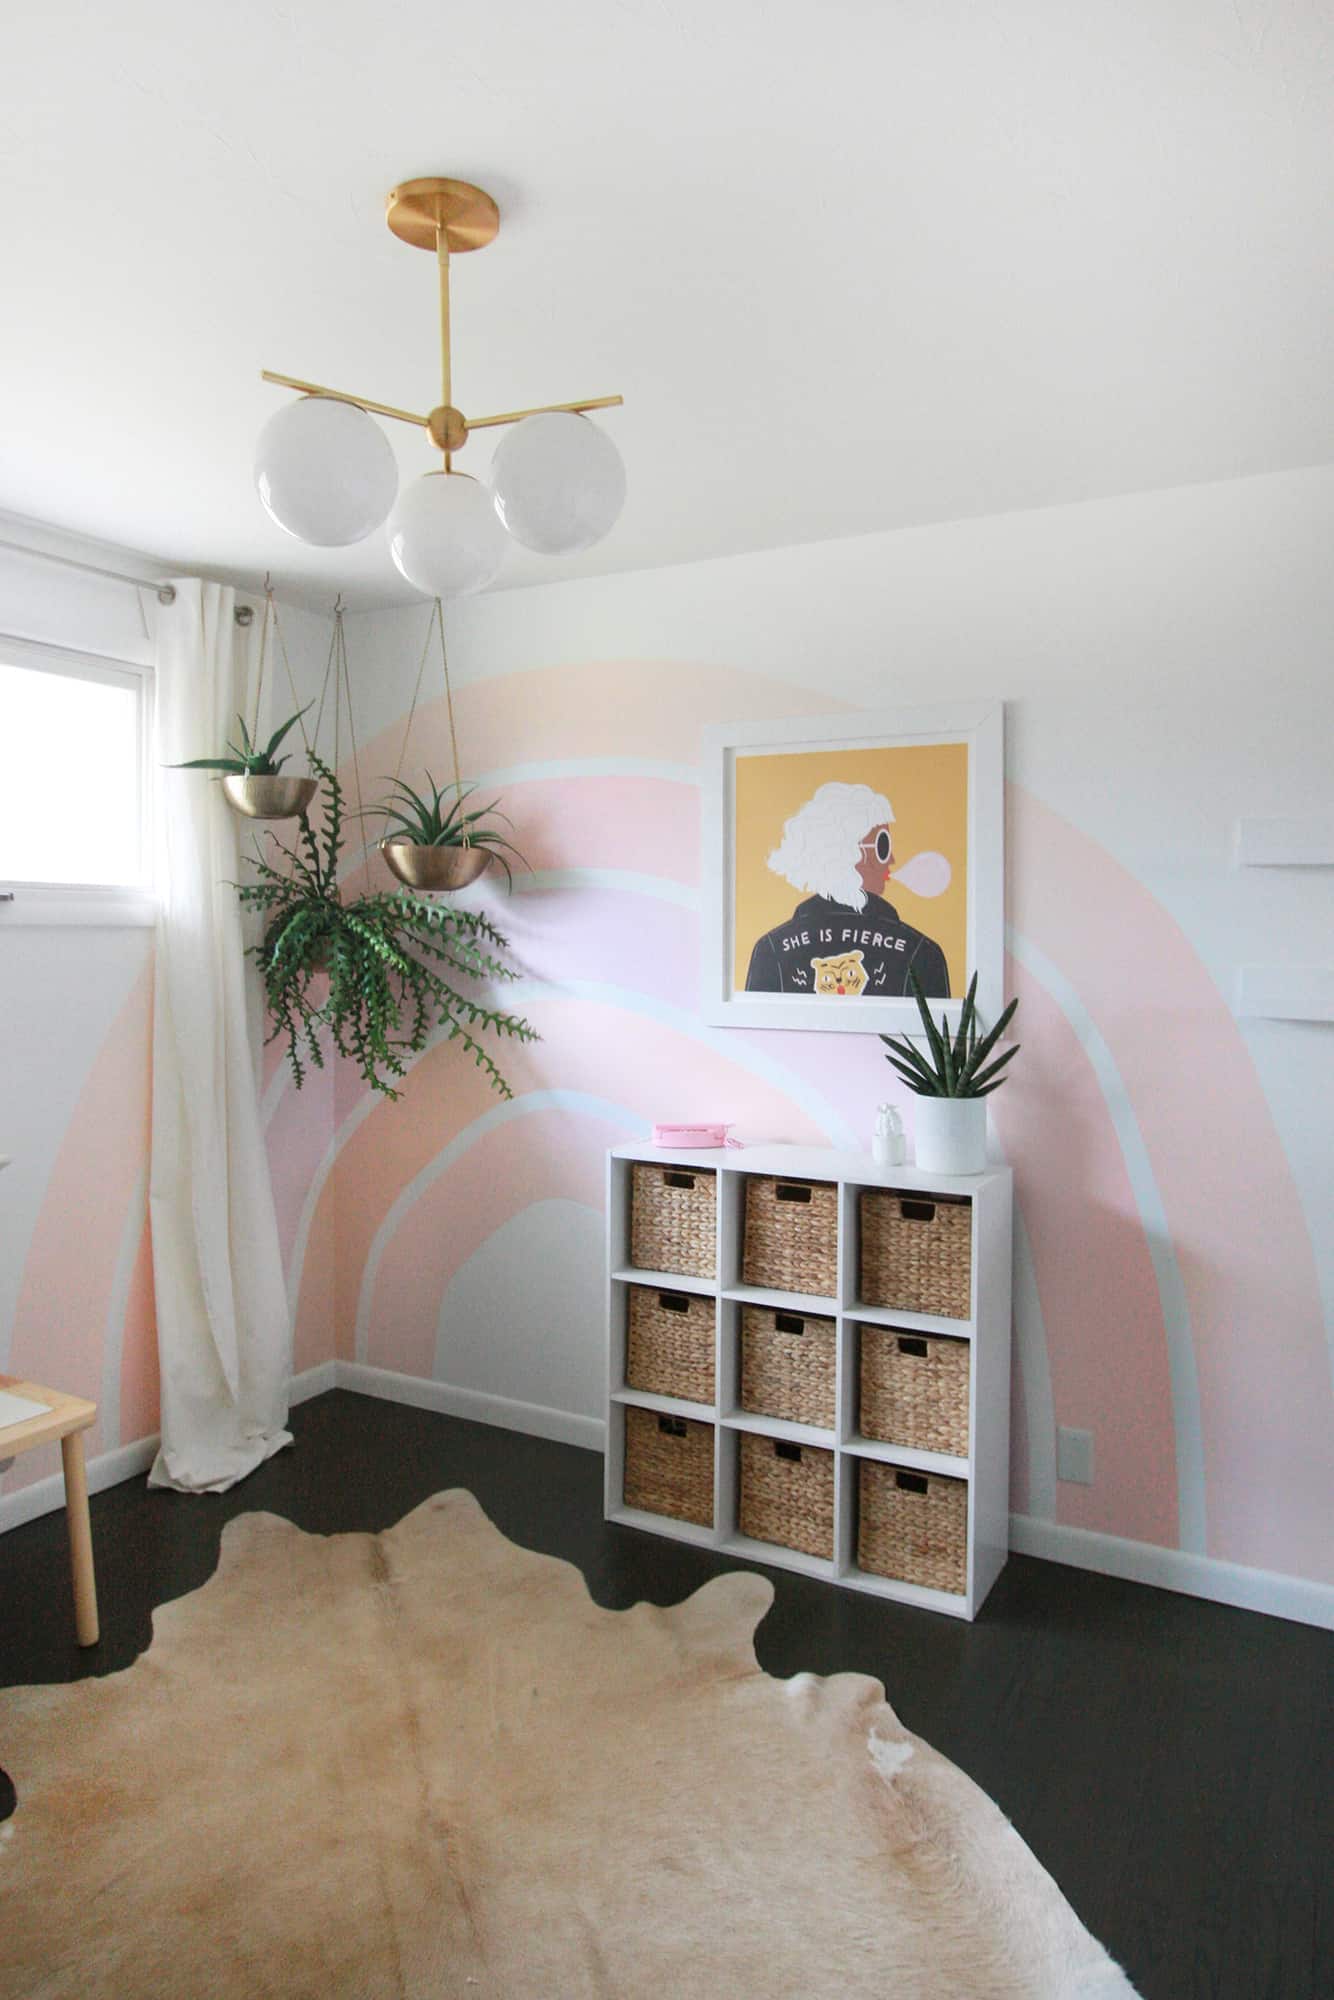 Light Fixture / West Elm, Art Print / Society 6, Wicker Baskets / The Container Store
 I love that this is a relatively easy statement wall (mostly a lot of waiting between coats), but it turned out SO CUTE and I adore it. It makes me so happy to pass by the wall every day now and being in that room feels so much more joyful than it did before.
One thing I decided on before starting the wall is that I would be OK with an imperfect rainbow shape, so I will say that also helps the process go a little faster if you aren’t measuring every arc and curve to perfection.
Also, feel free to complete your corner rainbow in whatever colors you want to fit your decor! I almost did this in an all neutral scheme (like tans and camels), buuuuuut I missed the pink too much so I had to add some in—whatever works for you!
We’ve got a ton of statement wall DIYs in our archive so browse those too and see if any strike your fancy for your space! Oh, and in case you aren’t the DIY type, they also make lots of rainbow decals for walls as well for a similar feel… xo. Laura
If you love this DIY, check out:
- 70s-Inspired Wave Wallpaper DIY
- Elsie’s Rainbow Bookshelves
- Rainbow Stairs DIY
Love this post? Sign up for our newsletter for more ideas!
Join Now

Get creative ideas for recipes, crafts, decor, and more in your inbox!
 Get the How-To
Supplies
- paint (for each rainbow strip)
- white paint (or a color to match your main wall )
- cardboard
- light-colored color pencil (for guide)
Equipment
-
painter tape
-
-scissors
-
paint brushes and rollers
Instructions
-
First, you’ll want to use pieces of painter’s tape to make the largest arch of your rainbow. I would tape where you want both sides to end, then put tape at the highest point where you want the middle of the arch to be, and then fill in the rest from there.
You can make your rainbow tall and skinny, fat and wide, lopsided—whatever you want!
-
Once you get a general outline of where your outer rainbow band will be, you can play connect the dots with the tape and get your outer edge taped off.
Depending on how many colors you want to use in your rainbow, you’ll need to decide how wide you want each rainbow stripe to be.
-
I wanted my stripes 10″ wide, so I cut a 10″ piece of cardboard and then taped a very light pink colored pencil to the other side so I could trace a 10″ gap and know where to place the next strip of painter’s tape.
I suggest using a very light colored pencil for this as I’ve had too many instances of using regular pencils for marking where it was difficult to cover over with my light colored paint.
-
Use your width tracer and run the non-pencil side against the tape mark of your rainbow band so it creates another line 10″ away. Use your painter’s tape to tape just on the outside of the pencil mark so your marks will be painted over and hidden.
-
It can be a little difficult to make an arch with straight painter’s tape, so I would either suggest cutting a piece of tape down the middle so it’s a lot thinner (and easier to bend into an arch shape) or you can make some cuts into the outside edge of the tape to about the halfway mark so you can bend the tape to your line more easily.
-
Once you get your first section taped off, you’ll want to take the main color of your wall (white in my case) and paint some of that color paint all along the edges of your rainbow band where the tape meets the rainbow.
-
It may seem like an unnecessary step, but using the wall color where the tape seam hits will actually give you the cleanest line of your rainbow color when you go to take the tape off!
-
Basically, if there is going to be any paint bleed on the tape line, the bleed will be the wall color and so it will disappear into the wall when you go to take the tape off. Believe me, I’ve done it without this step in the past and I’ll never skip it again! It works really well.
-
Repeat by taping off the outer edge of the next layer and then using your cardboard width tracer to show you where the next tape line should be.
Tape your second line, paint with your wall color along the edges, and fill with your main color. Repeat until each layer of your rainbow is done.
Notes
Also, feel free to complete your corner rainbow in whatever colors you want to fit your decor! I almost did this in an all neutral scheme (like tans and camels), buuuuuut I missed the pink too much so I had to add some in—whatever works for you!